Poursuite d’une Pochette
Role: Product Designer
Skills: Design Sketching, Rapid Prototyping, CAD (Fusion 360), Metal Forming (Bending and Slip Rolling), Waterjet, Aircraft Riveting, Bead Blasting, Sanding and Polishing, Hemming and Gluing
Overview: Created handbag out of sheet metal using machinery available in the Stanford Product Realization Lab and upholstered with fur.

Design Intent
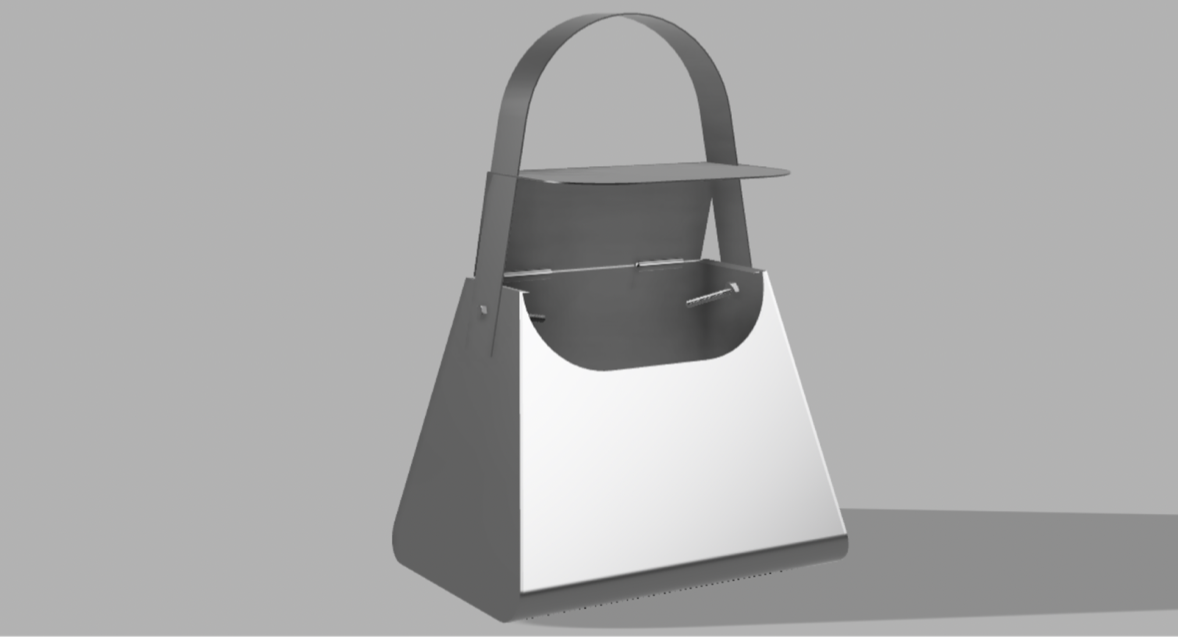
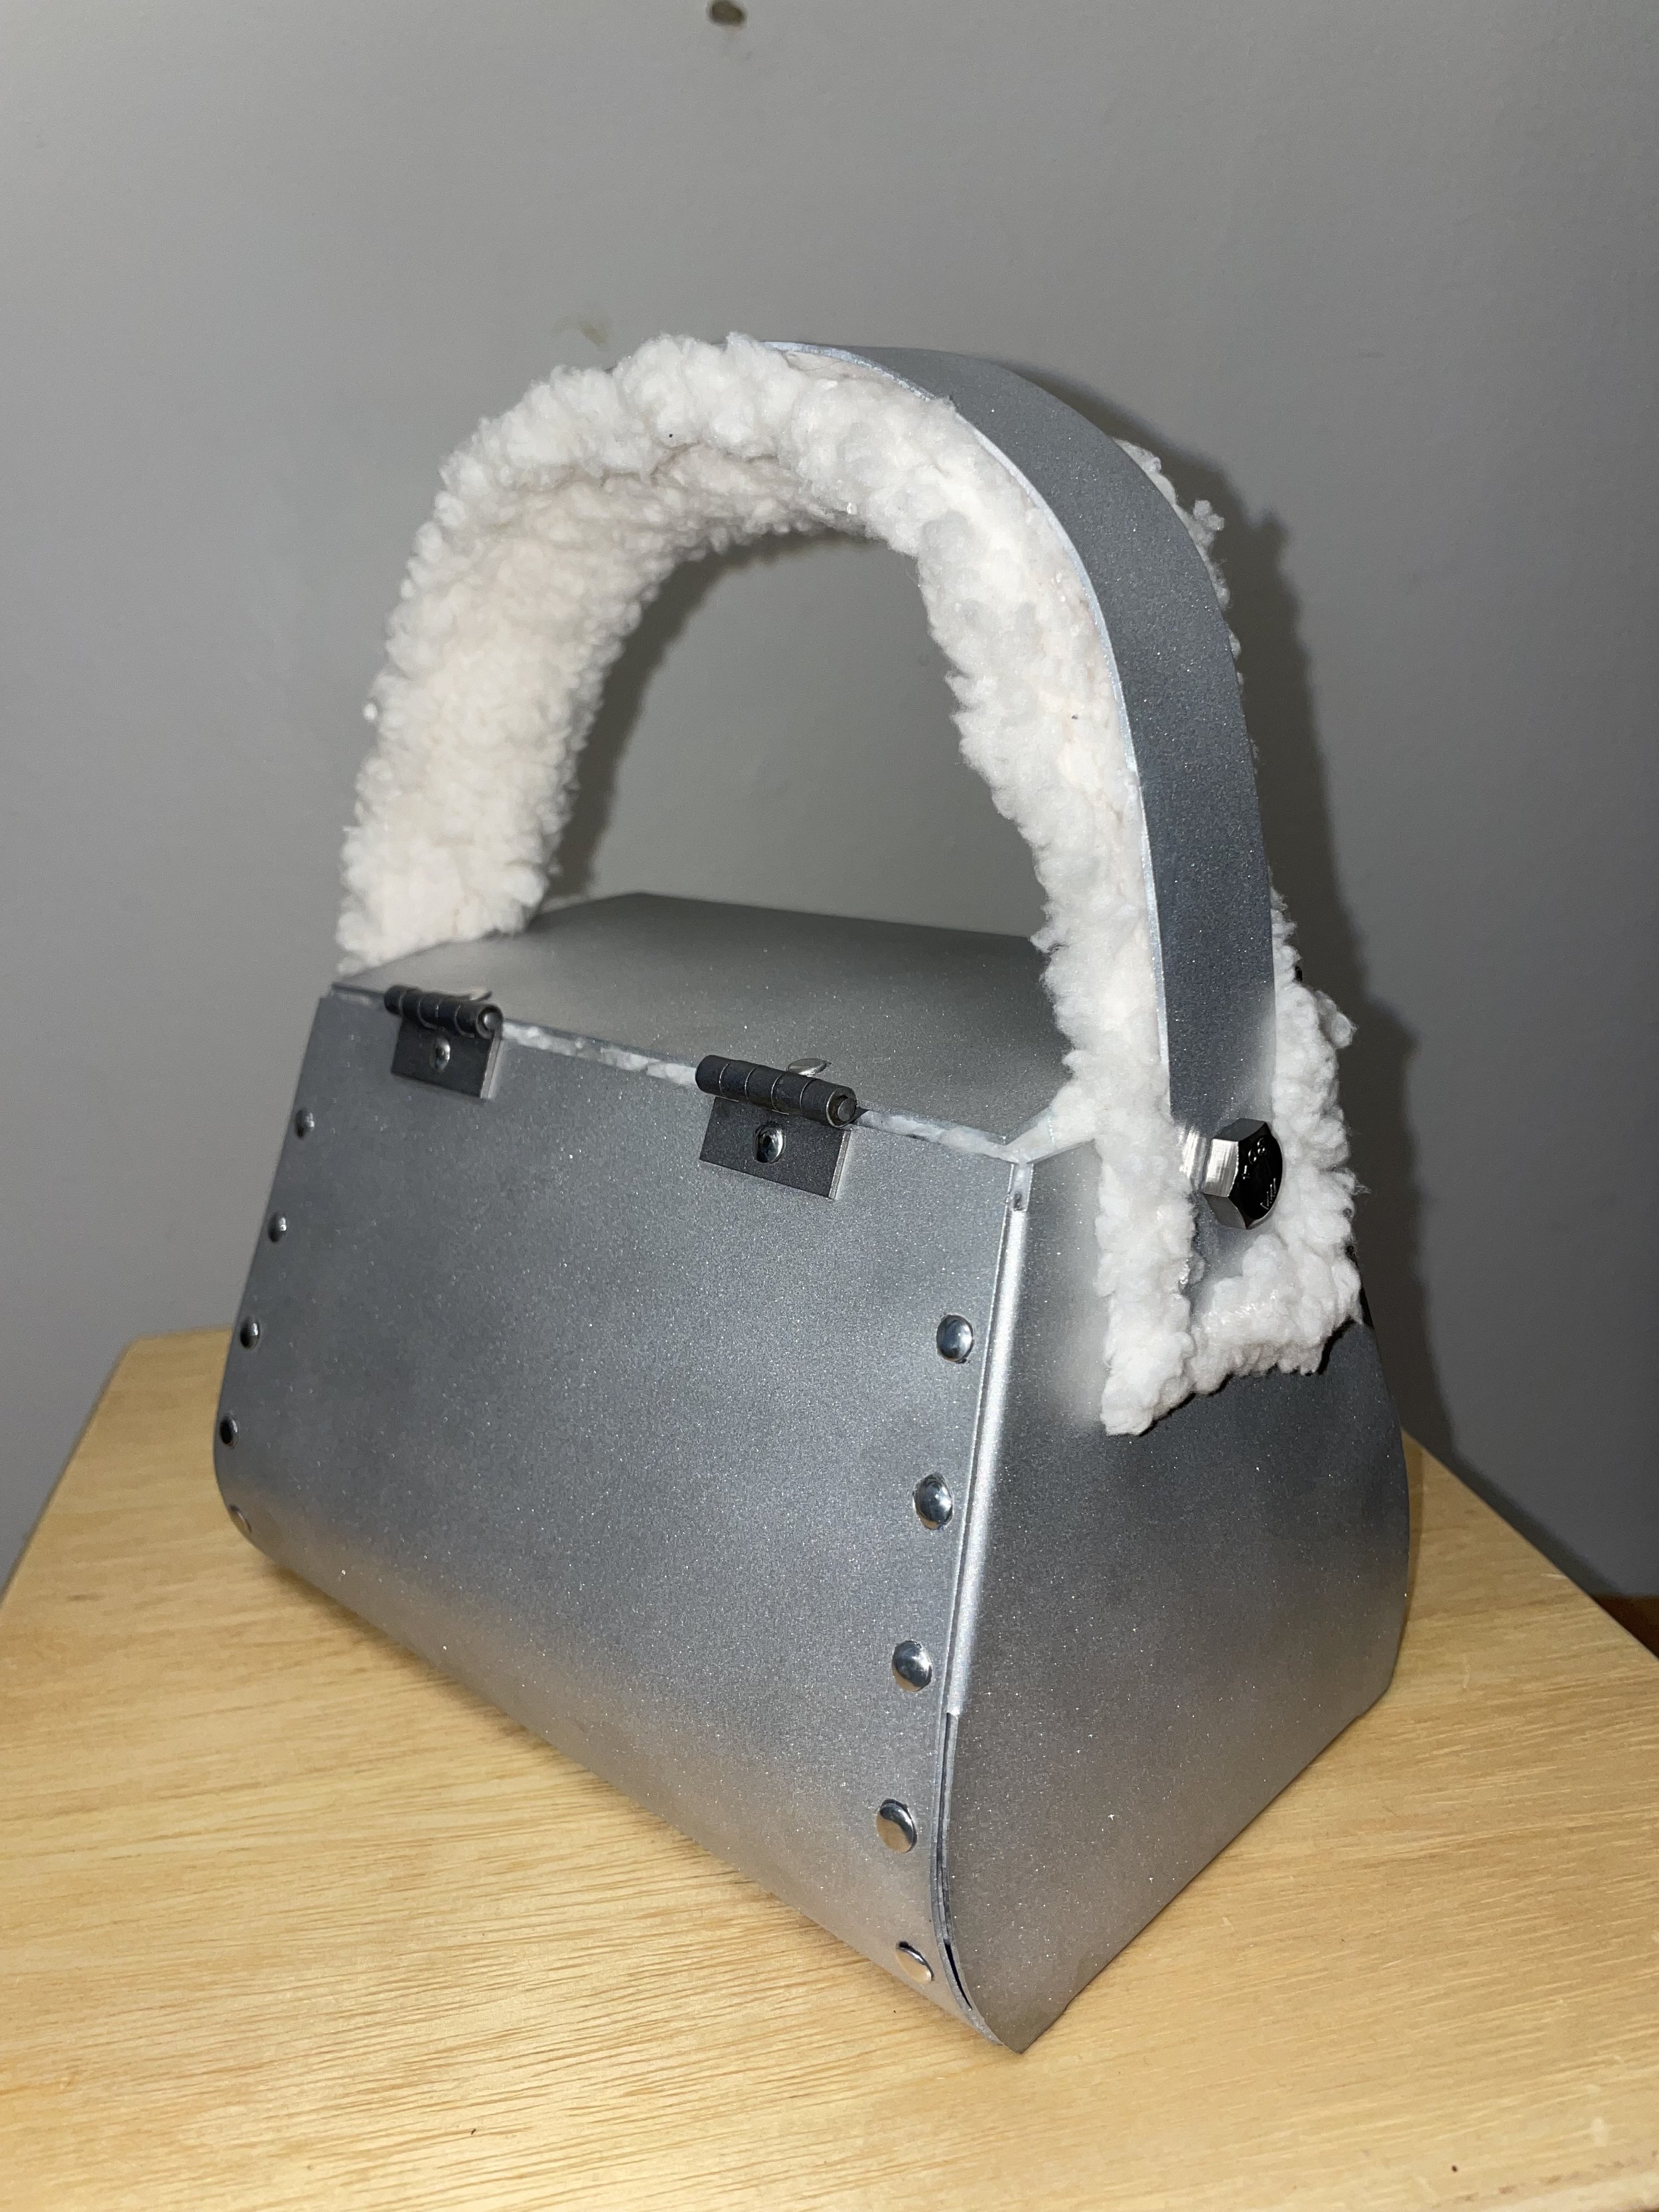
Poursuite d’une Pochette
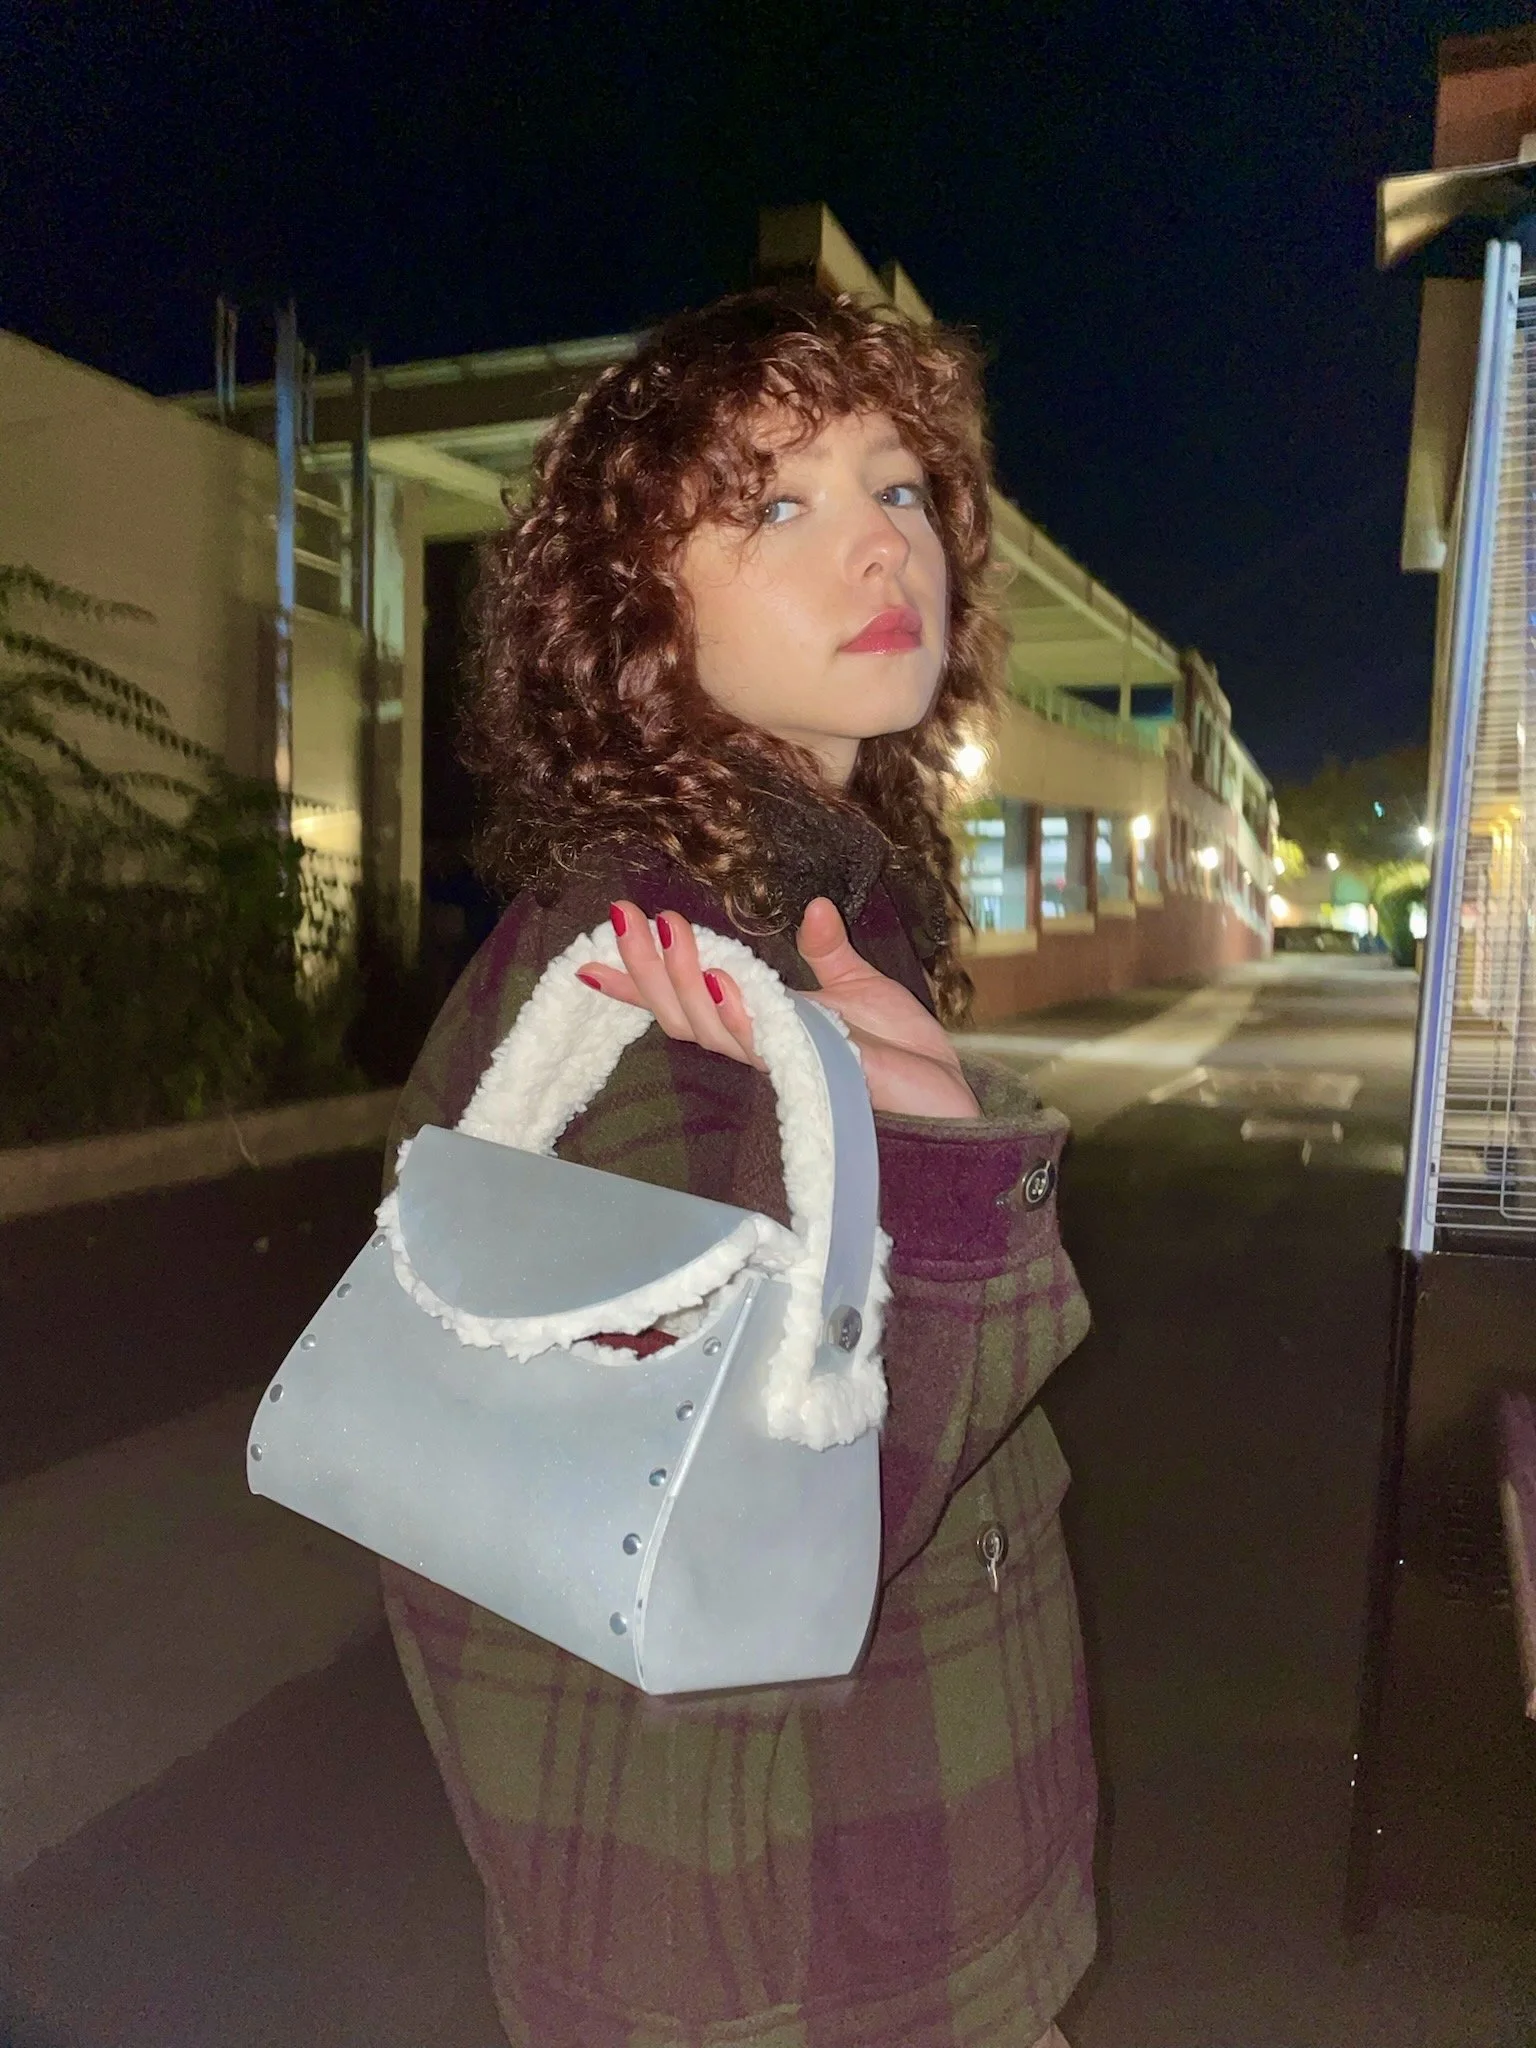
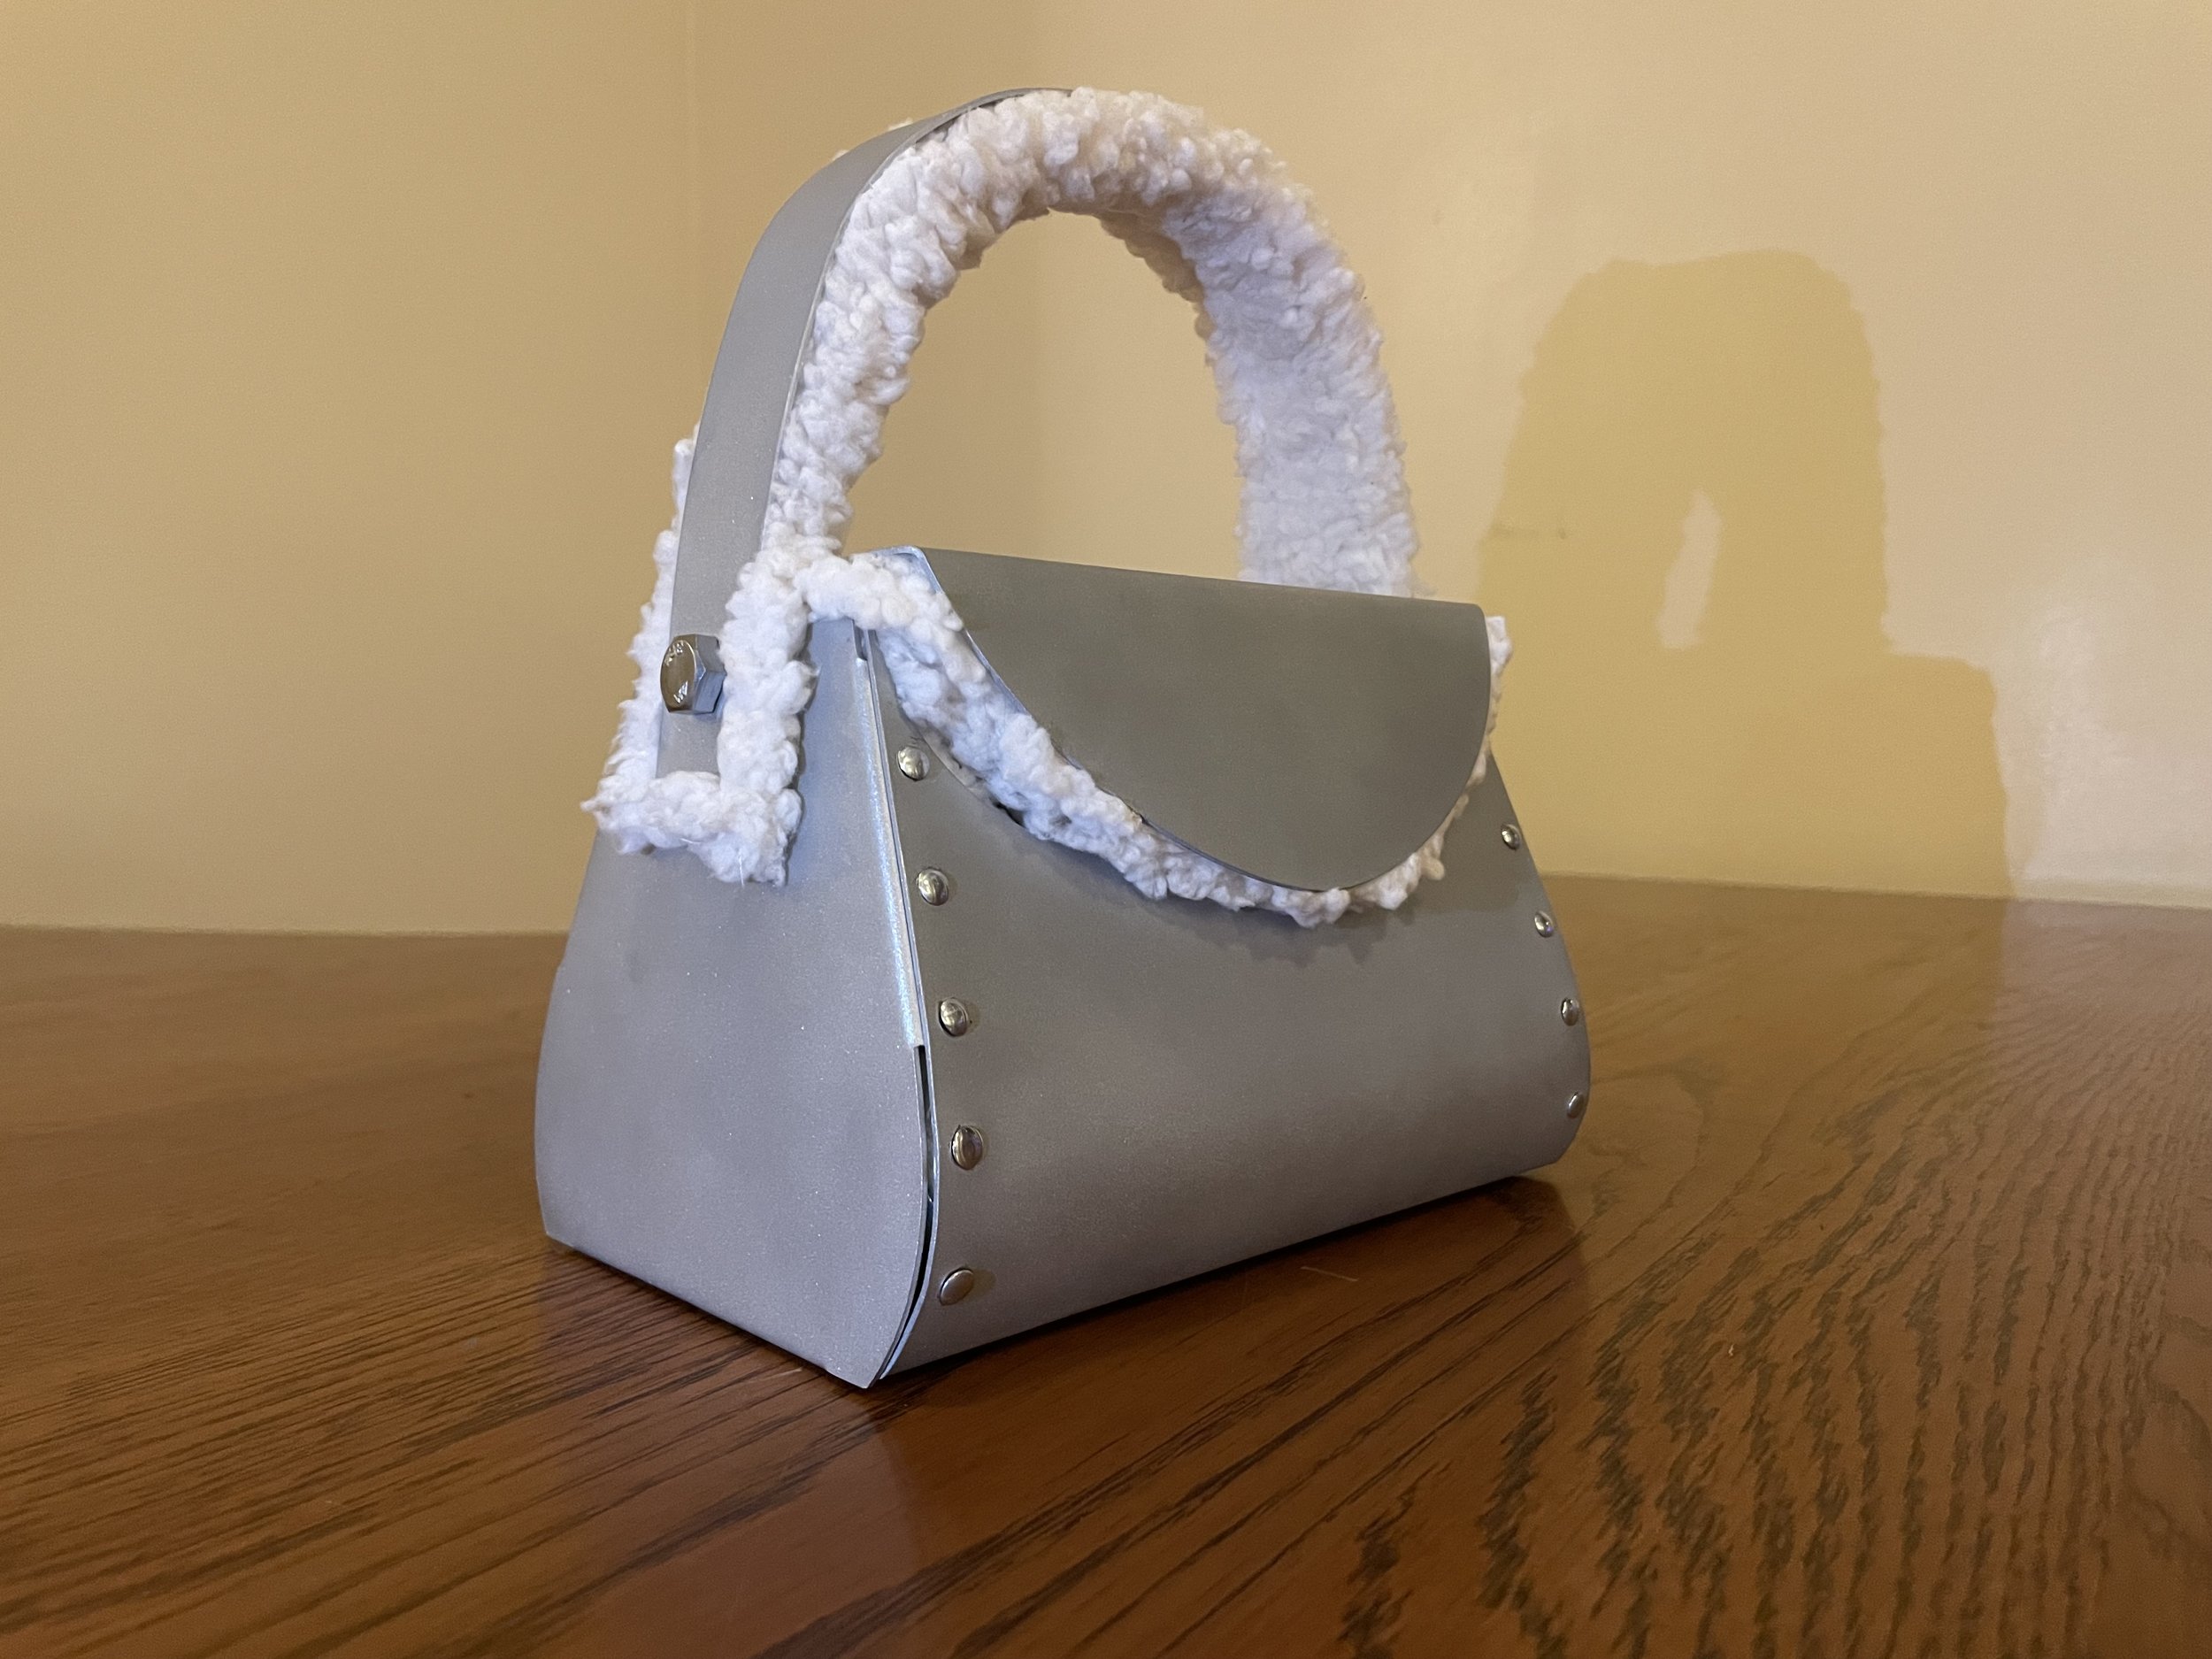
A purse made out of steel.
Because my mom desperately wants me to find a purse, this device would act as commentary on that desire and my relationship with femininity in the fashion world, by designing my ideal bag but making it out of metal so I wouldn’t actually be able to use it. (I prefer backpacks).
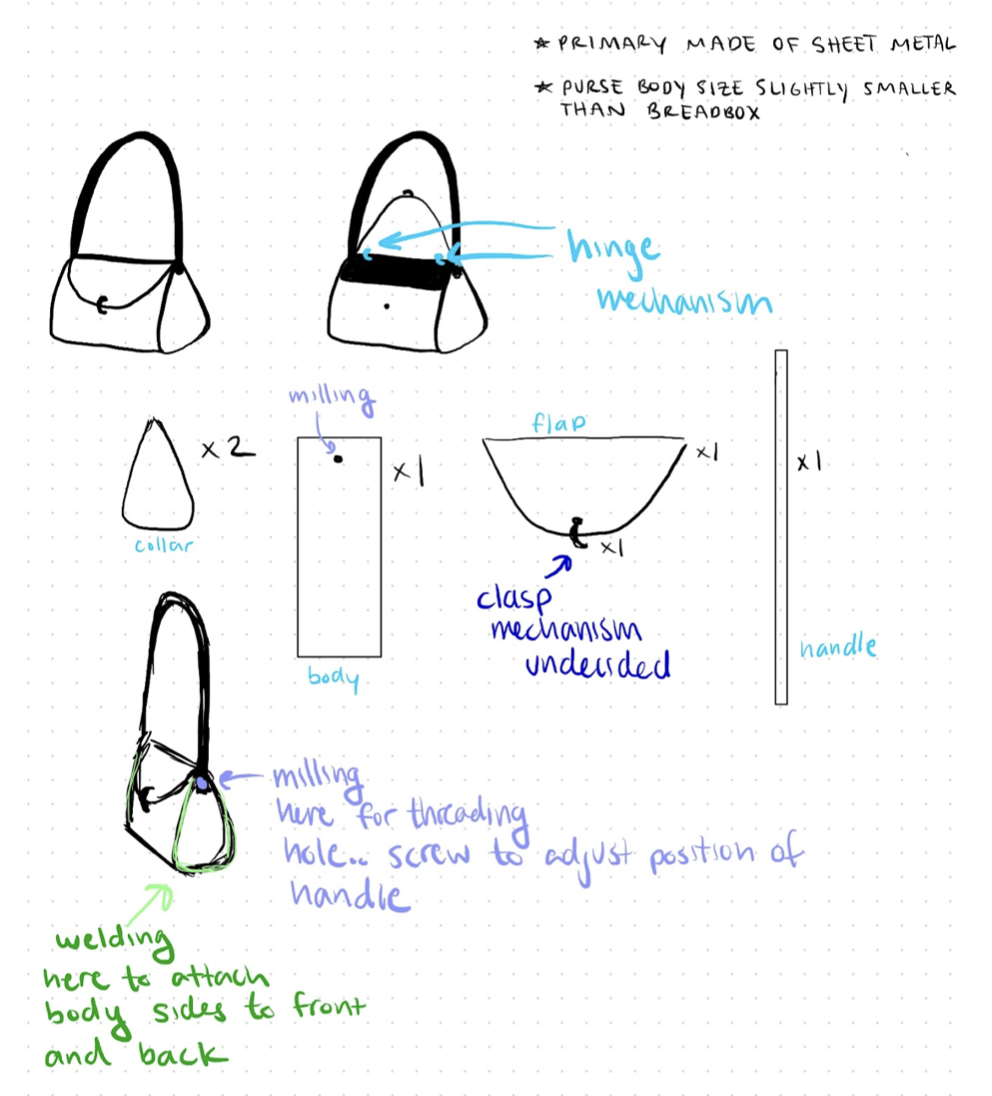
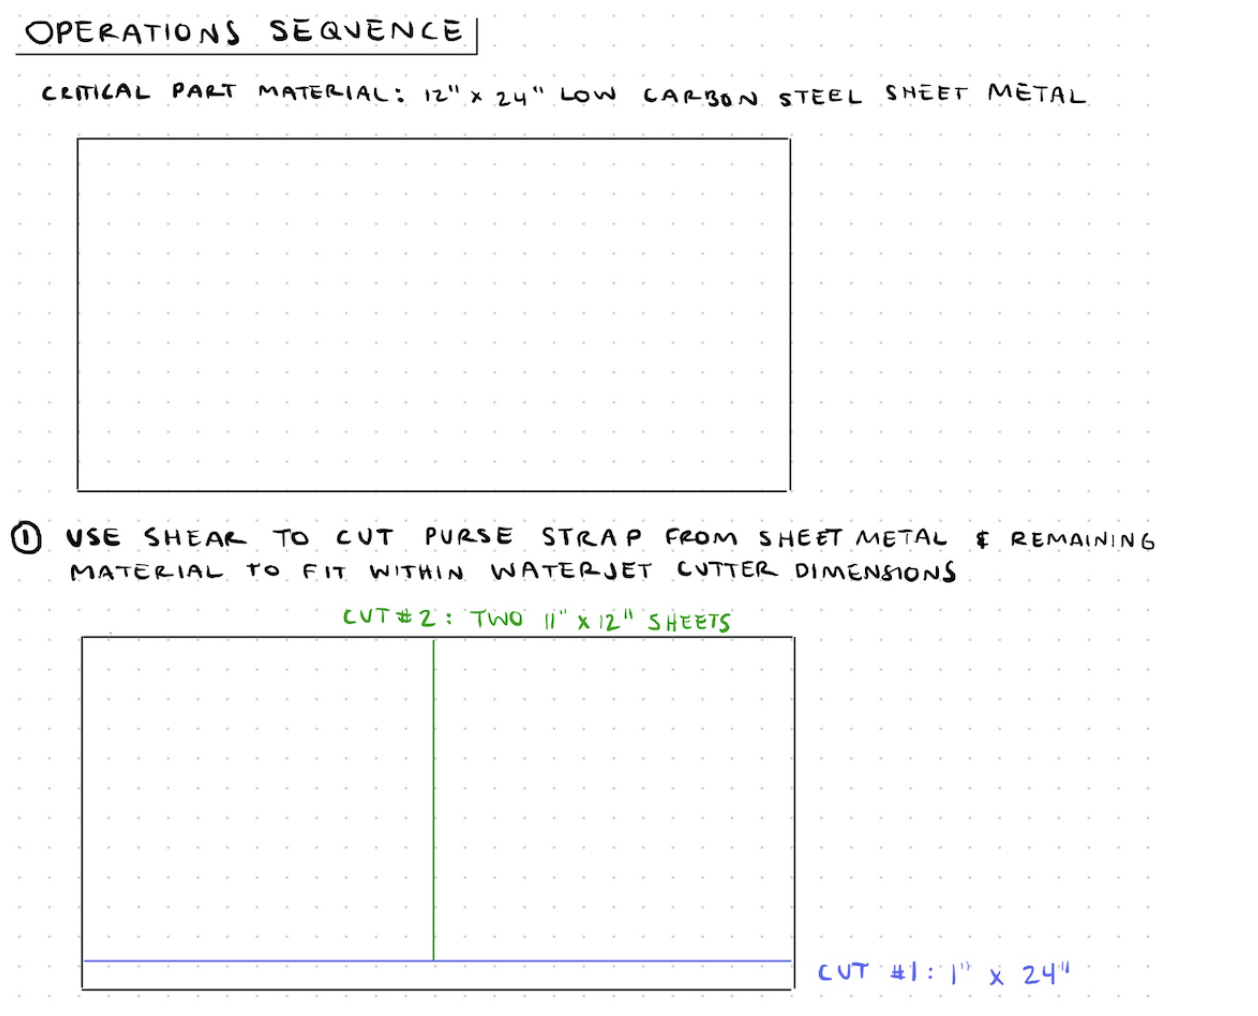
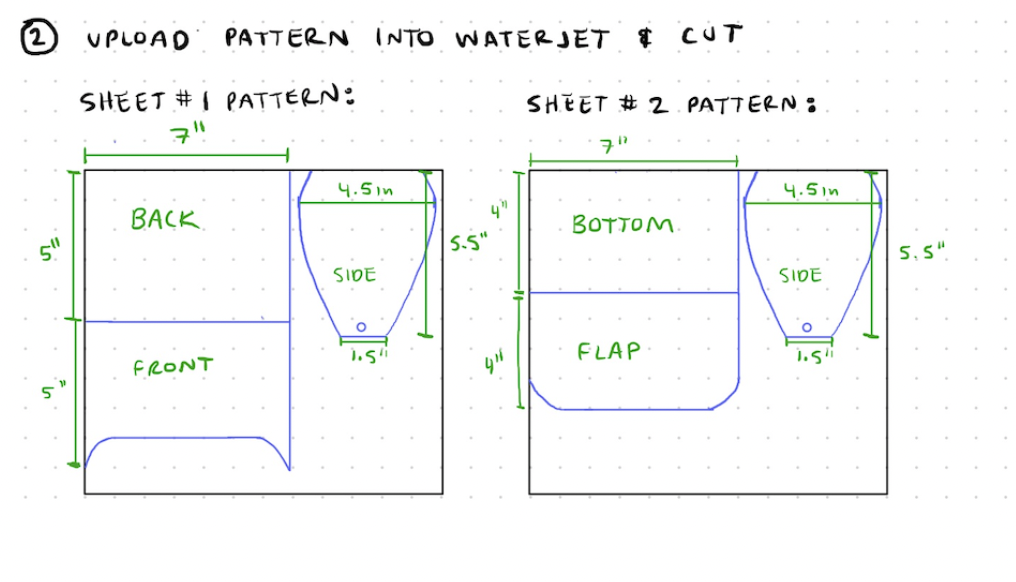
Below is a progression of my brainstorming, concept sketches, and operation sequence.


Rapid Prototyping and CAD


Physical Prototyping
Design Challenge: Creation of the Form
I first started by using a slip-rolled piece of sheet metal and tapering the sides of it to the desired angle on the Bandsaw. In hindsight, I should have tapered the sides using the Corner Notcher before slip-rolling this back piece, because it was difficult to carry out this action on the bandsaw with the curvature.
In order to create the pattern to cut with the Waterjet, I needed the radius from the slip-rolled side because that would become the shape of the sides of the purse. Retrieving this radius ended up being more difficult than I imagined. I first tried using calculations, but the curvature did not follow the arc of a circle enough to produce a desirable outcome.
To successfully import the shape into Illustrator, I traced the curve that the tapered side of the back piece made onto a piece of paper. I then photocopied the paper and traced a replica of the curvature in Illustrator.
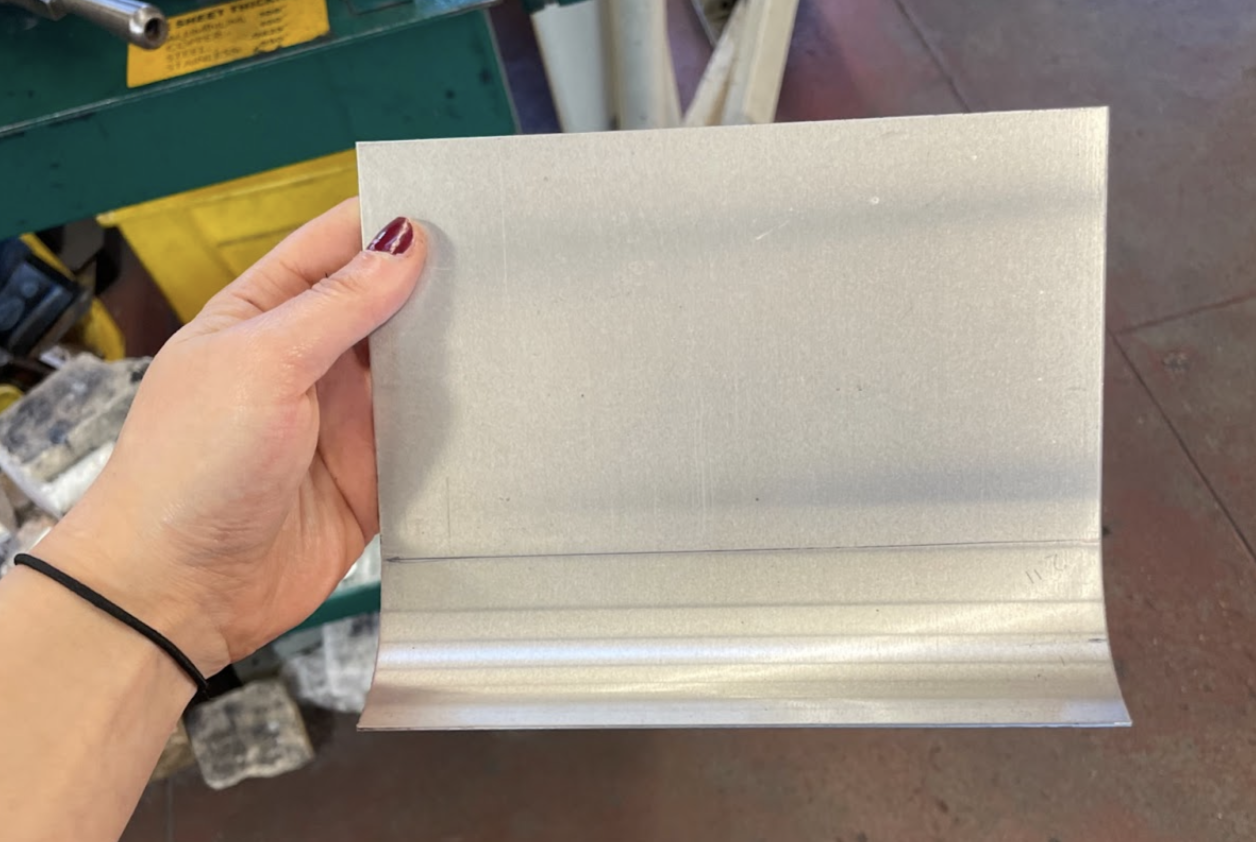
Slip rolled sheet metal

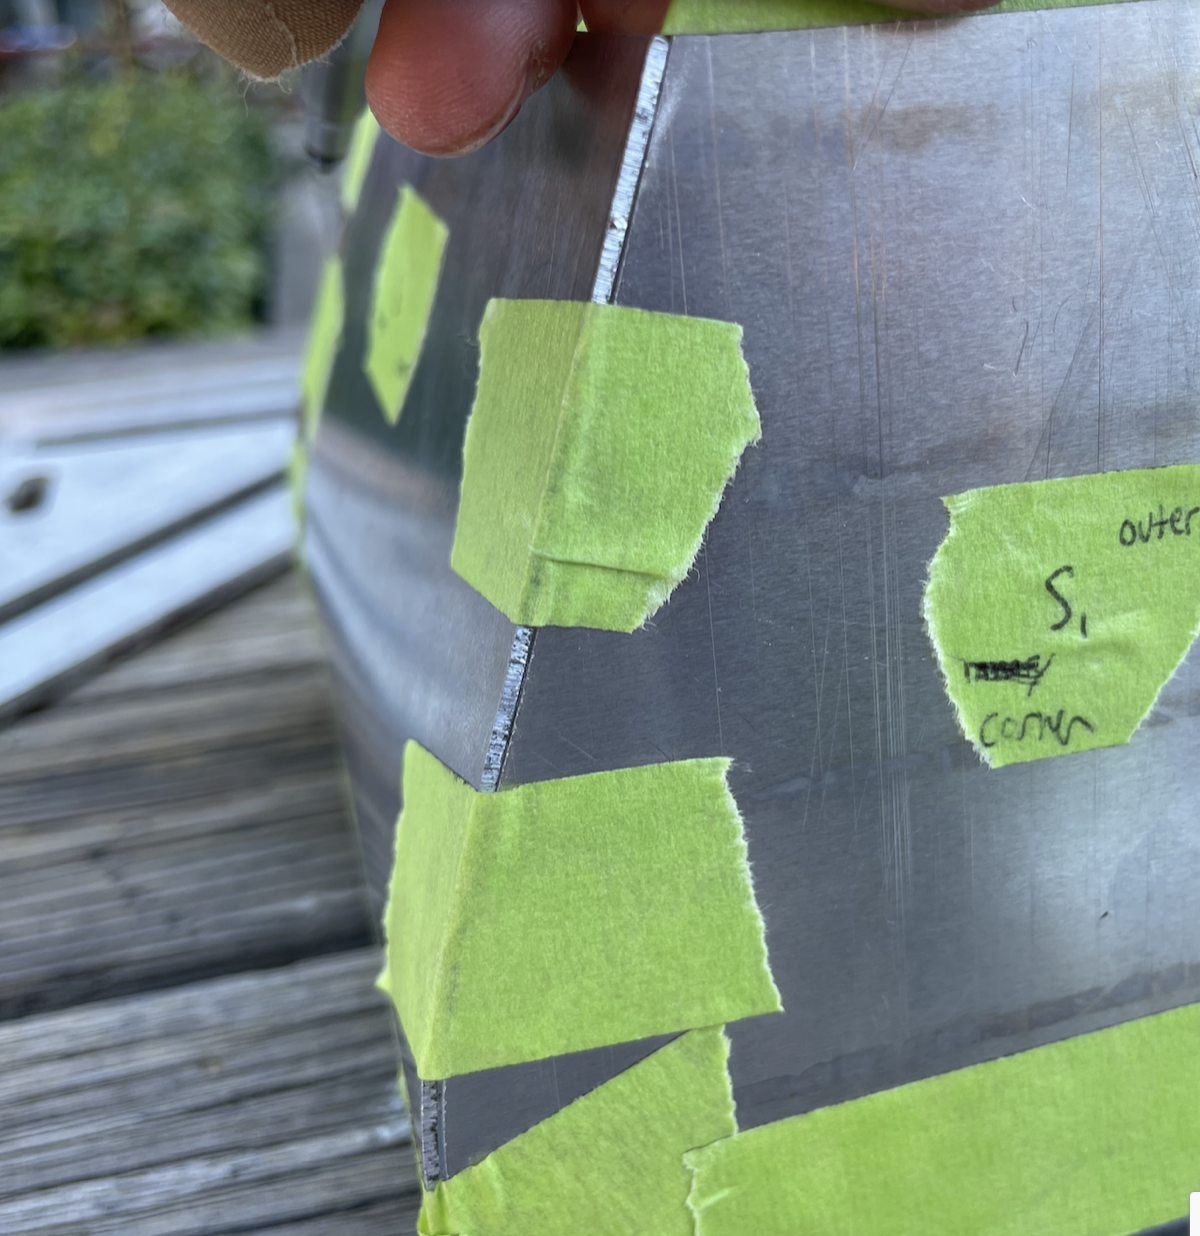
Using tape to mark the desired taper that would be cut using the Bandsaw
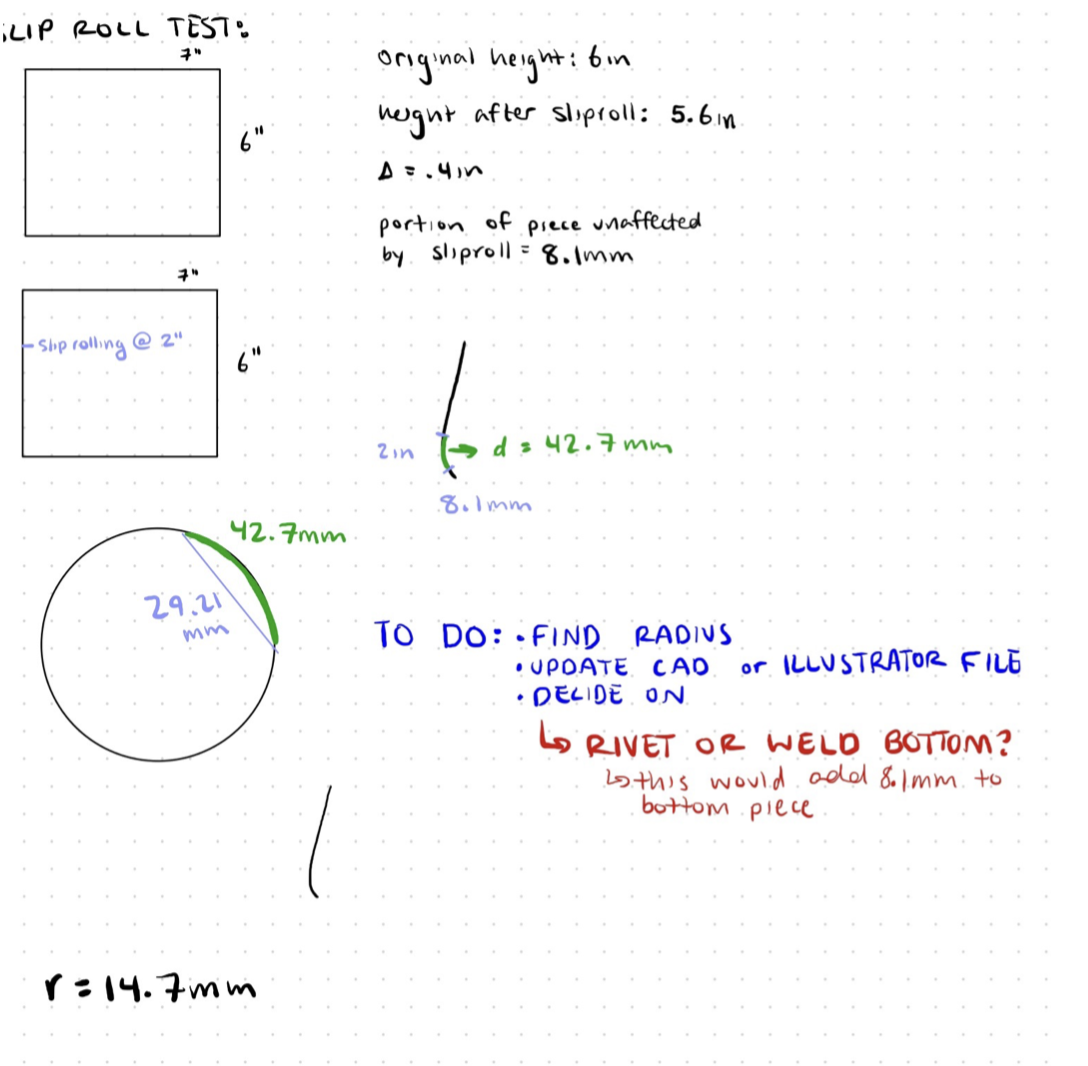
Notes to self about process and failed attempt at calculating a radius from the arc.
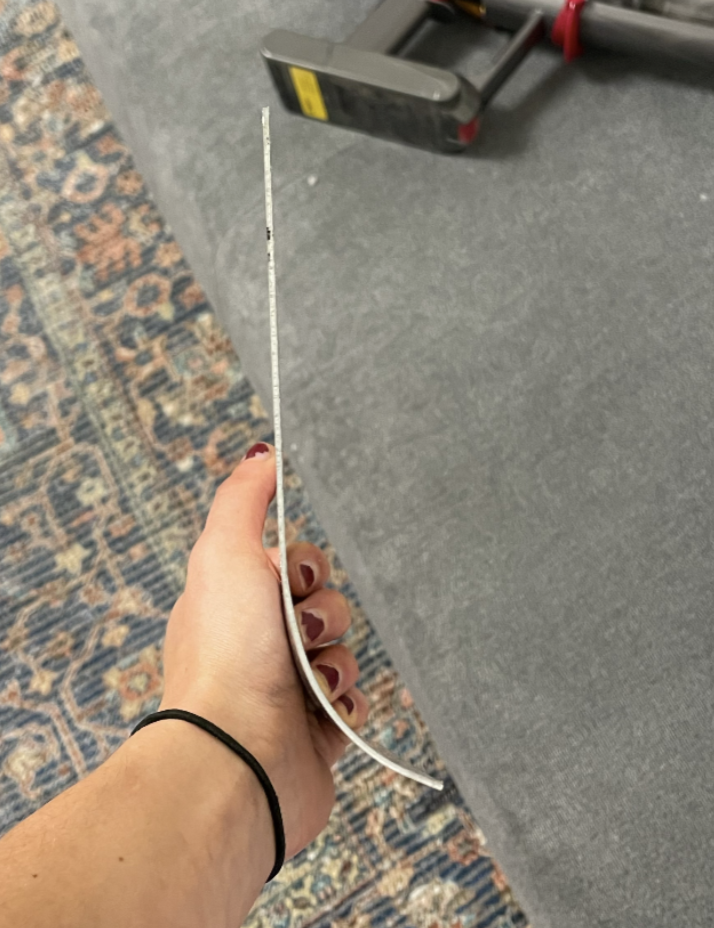
Photo taken in attempt to capture the curvature of the slip rolled metal

Photocopied image of traced curve
With these components, I ended up with my initial pattern and used the Waterjet to cut the shape. This process was very frustrating and ended up taking a lot longer than I expected because of some issues my file was having with the software. With a lot of troubleshooting, I fixed the file by taking a screenshot of the drawing, using the Image Trace function on Adobe Illustrator, scaling the image to the size of the original piece, and exporting this as a DXF.
After this, I used a hole puncher to punch rivet holes on the piece to initialize the connection that would be made using the rivet gun for the bottom of the purse. In hindsight, I should have added the holes onto the file itself because they did not come out perfectly aligned. Finally, to complete the critical part, I taped the body of the purse together to ensure that everything was measured, rolled, and cut correctly.
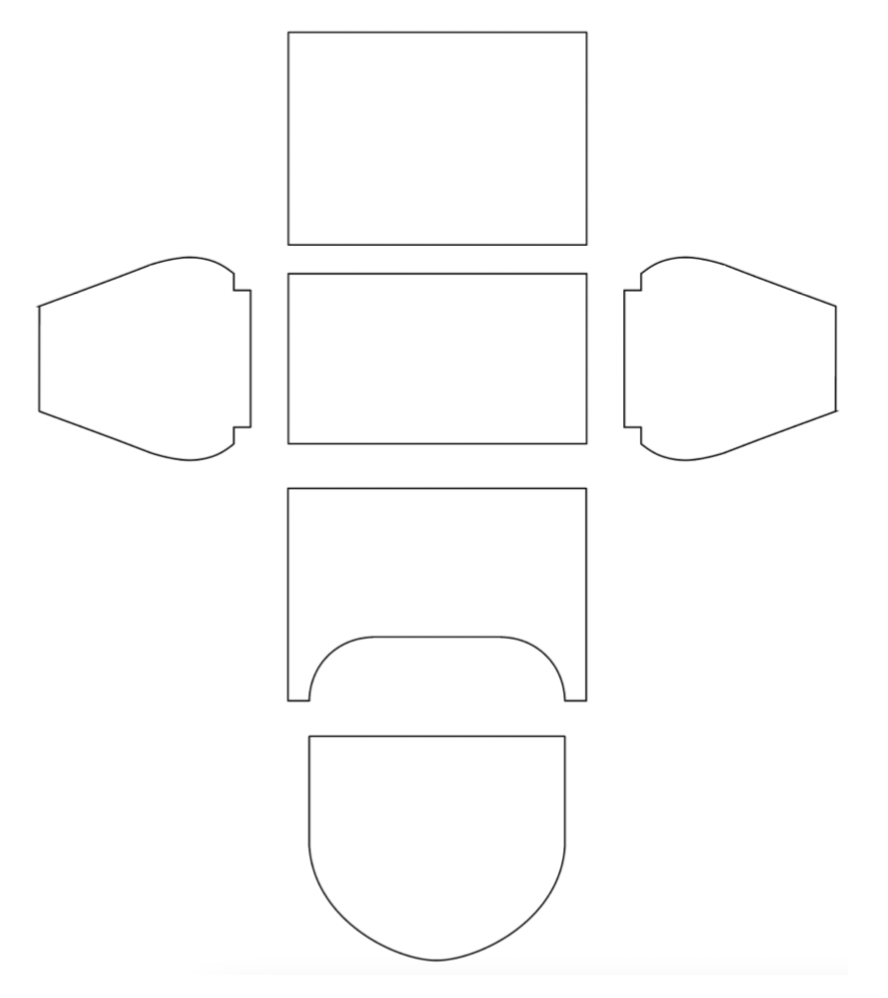
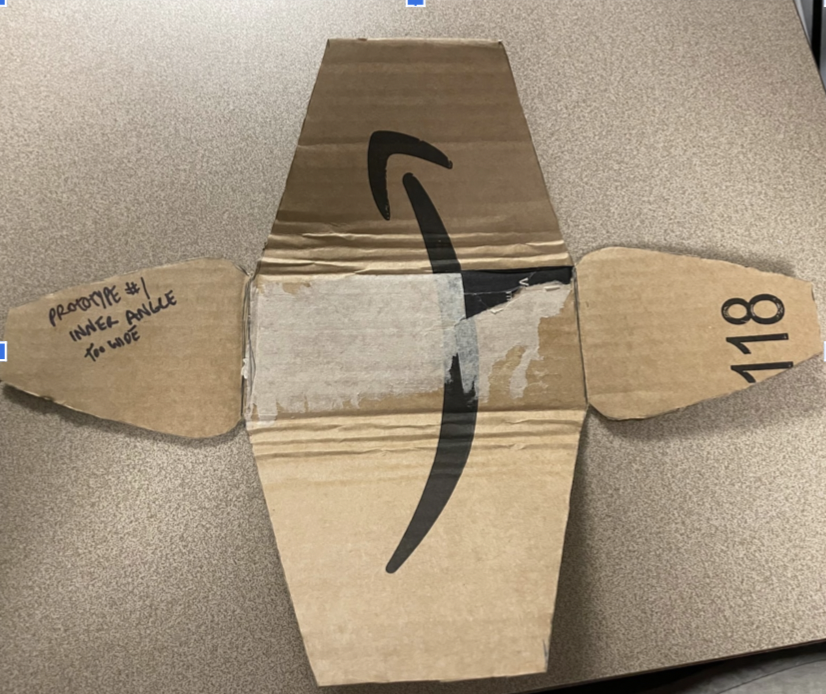
Initial purse pattern
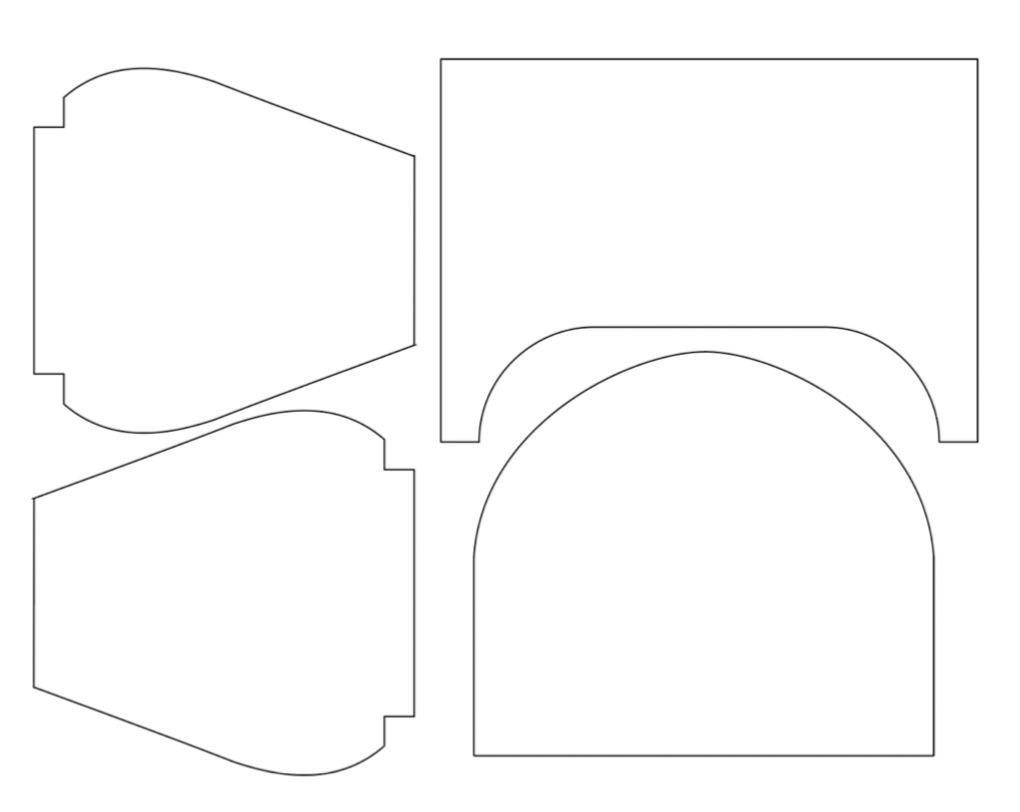
Organized pattern in order to fit onto the Waterjet board

Waterjet front piece of purse

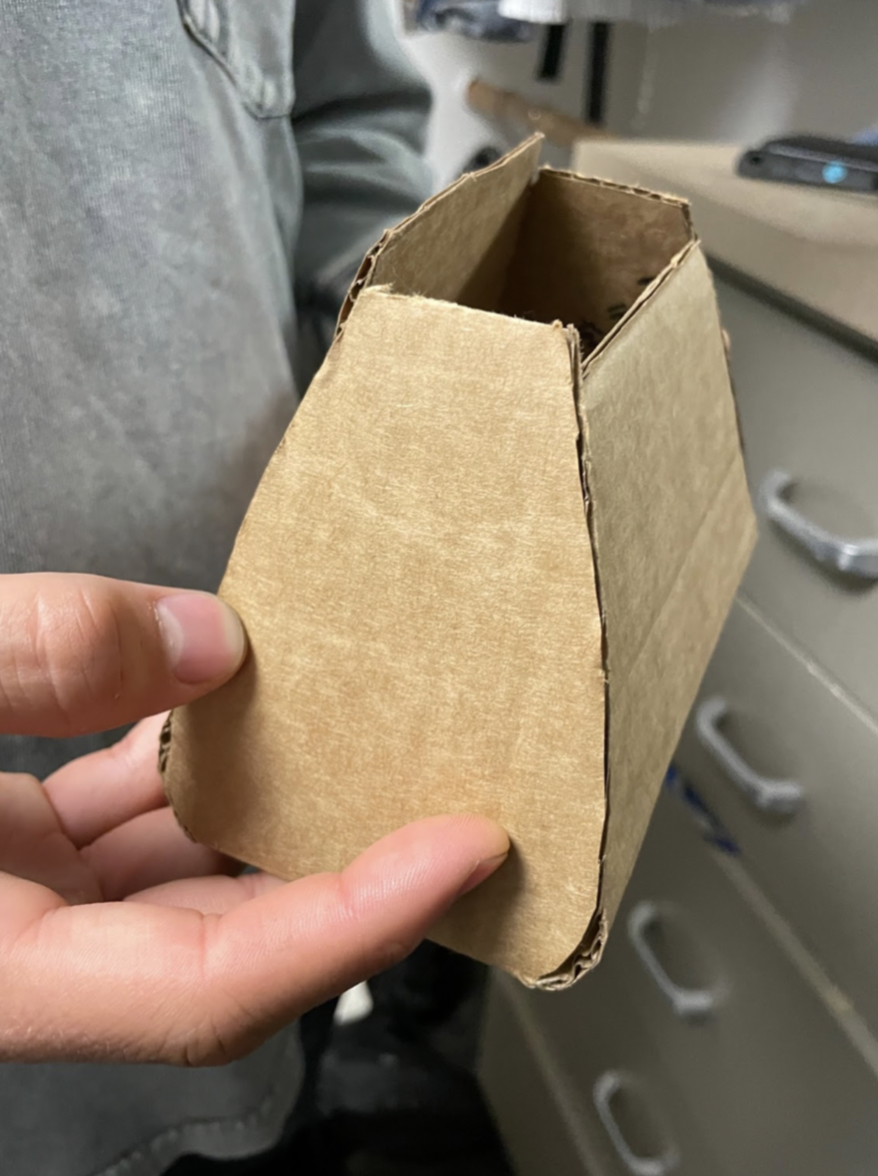
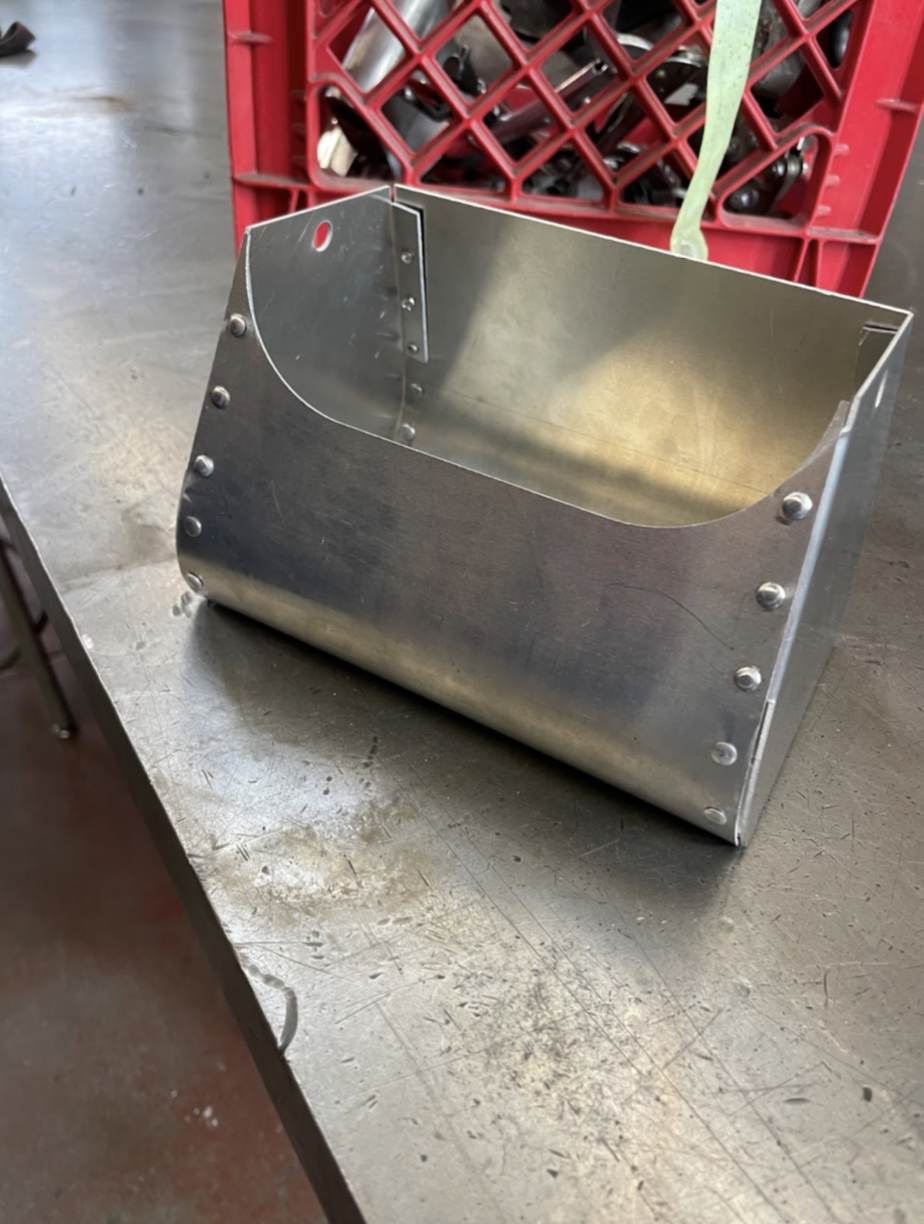
Critical part assembled
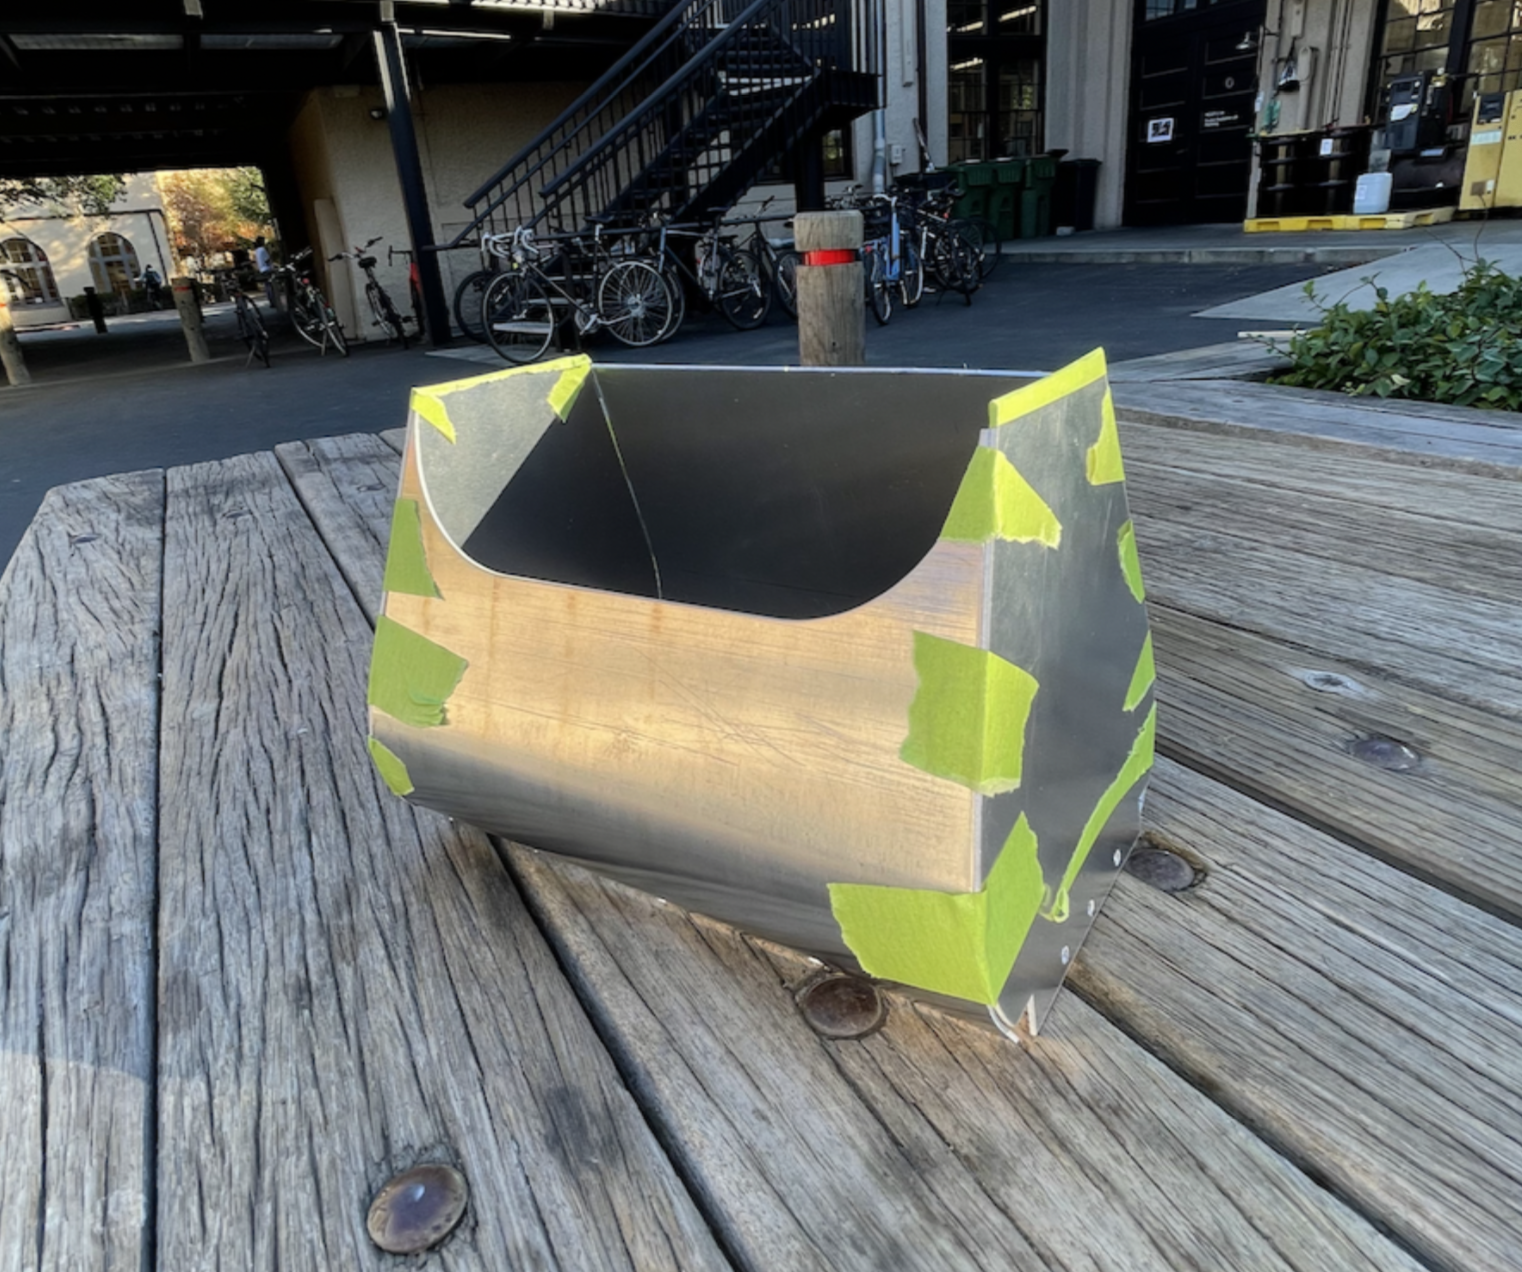
Critical part assembled
The perfect fit!
Final Assembly
Below are process photos of the final assembly of the purse body. Click on an image to learn more.

Waterjet cut pieces
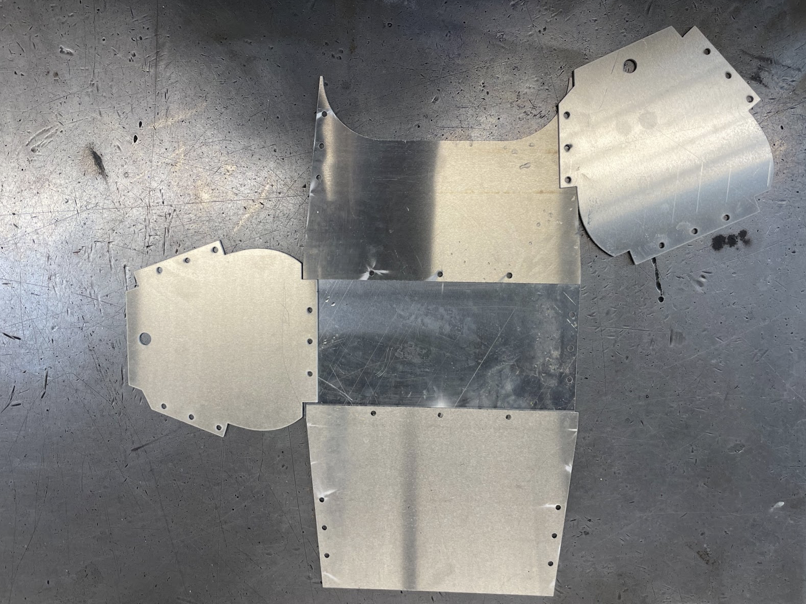
Ensuring the holes and pieces lined up

Used clecos to test the ability of the rivet connections (specifically if I would be able to fit the flaps on the sides of the bag inside of the body instead of resting them on the outsides)
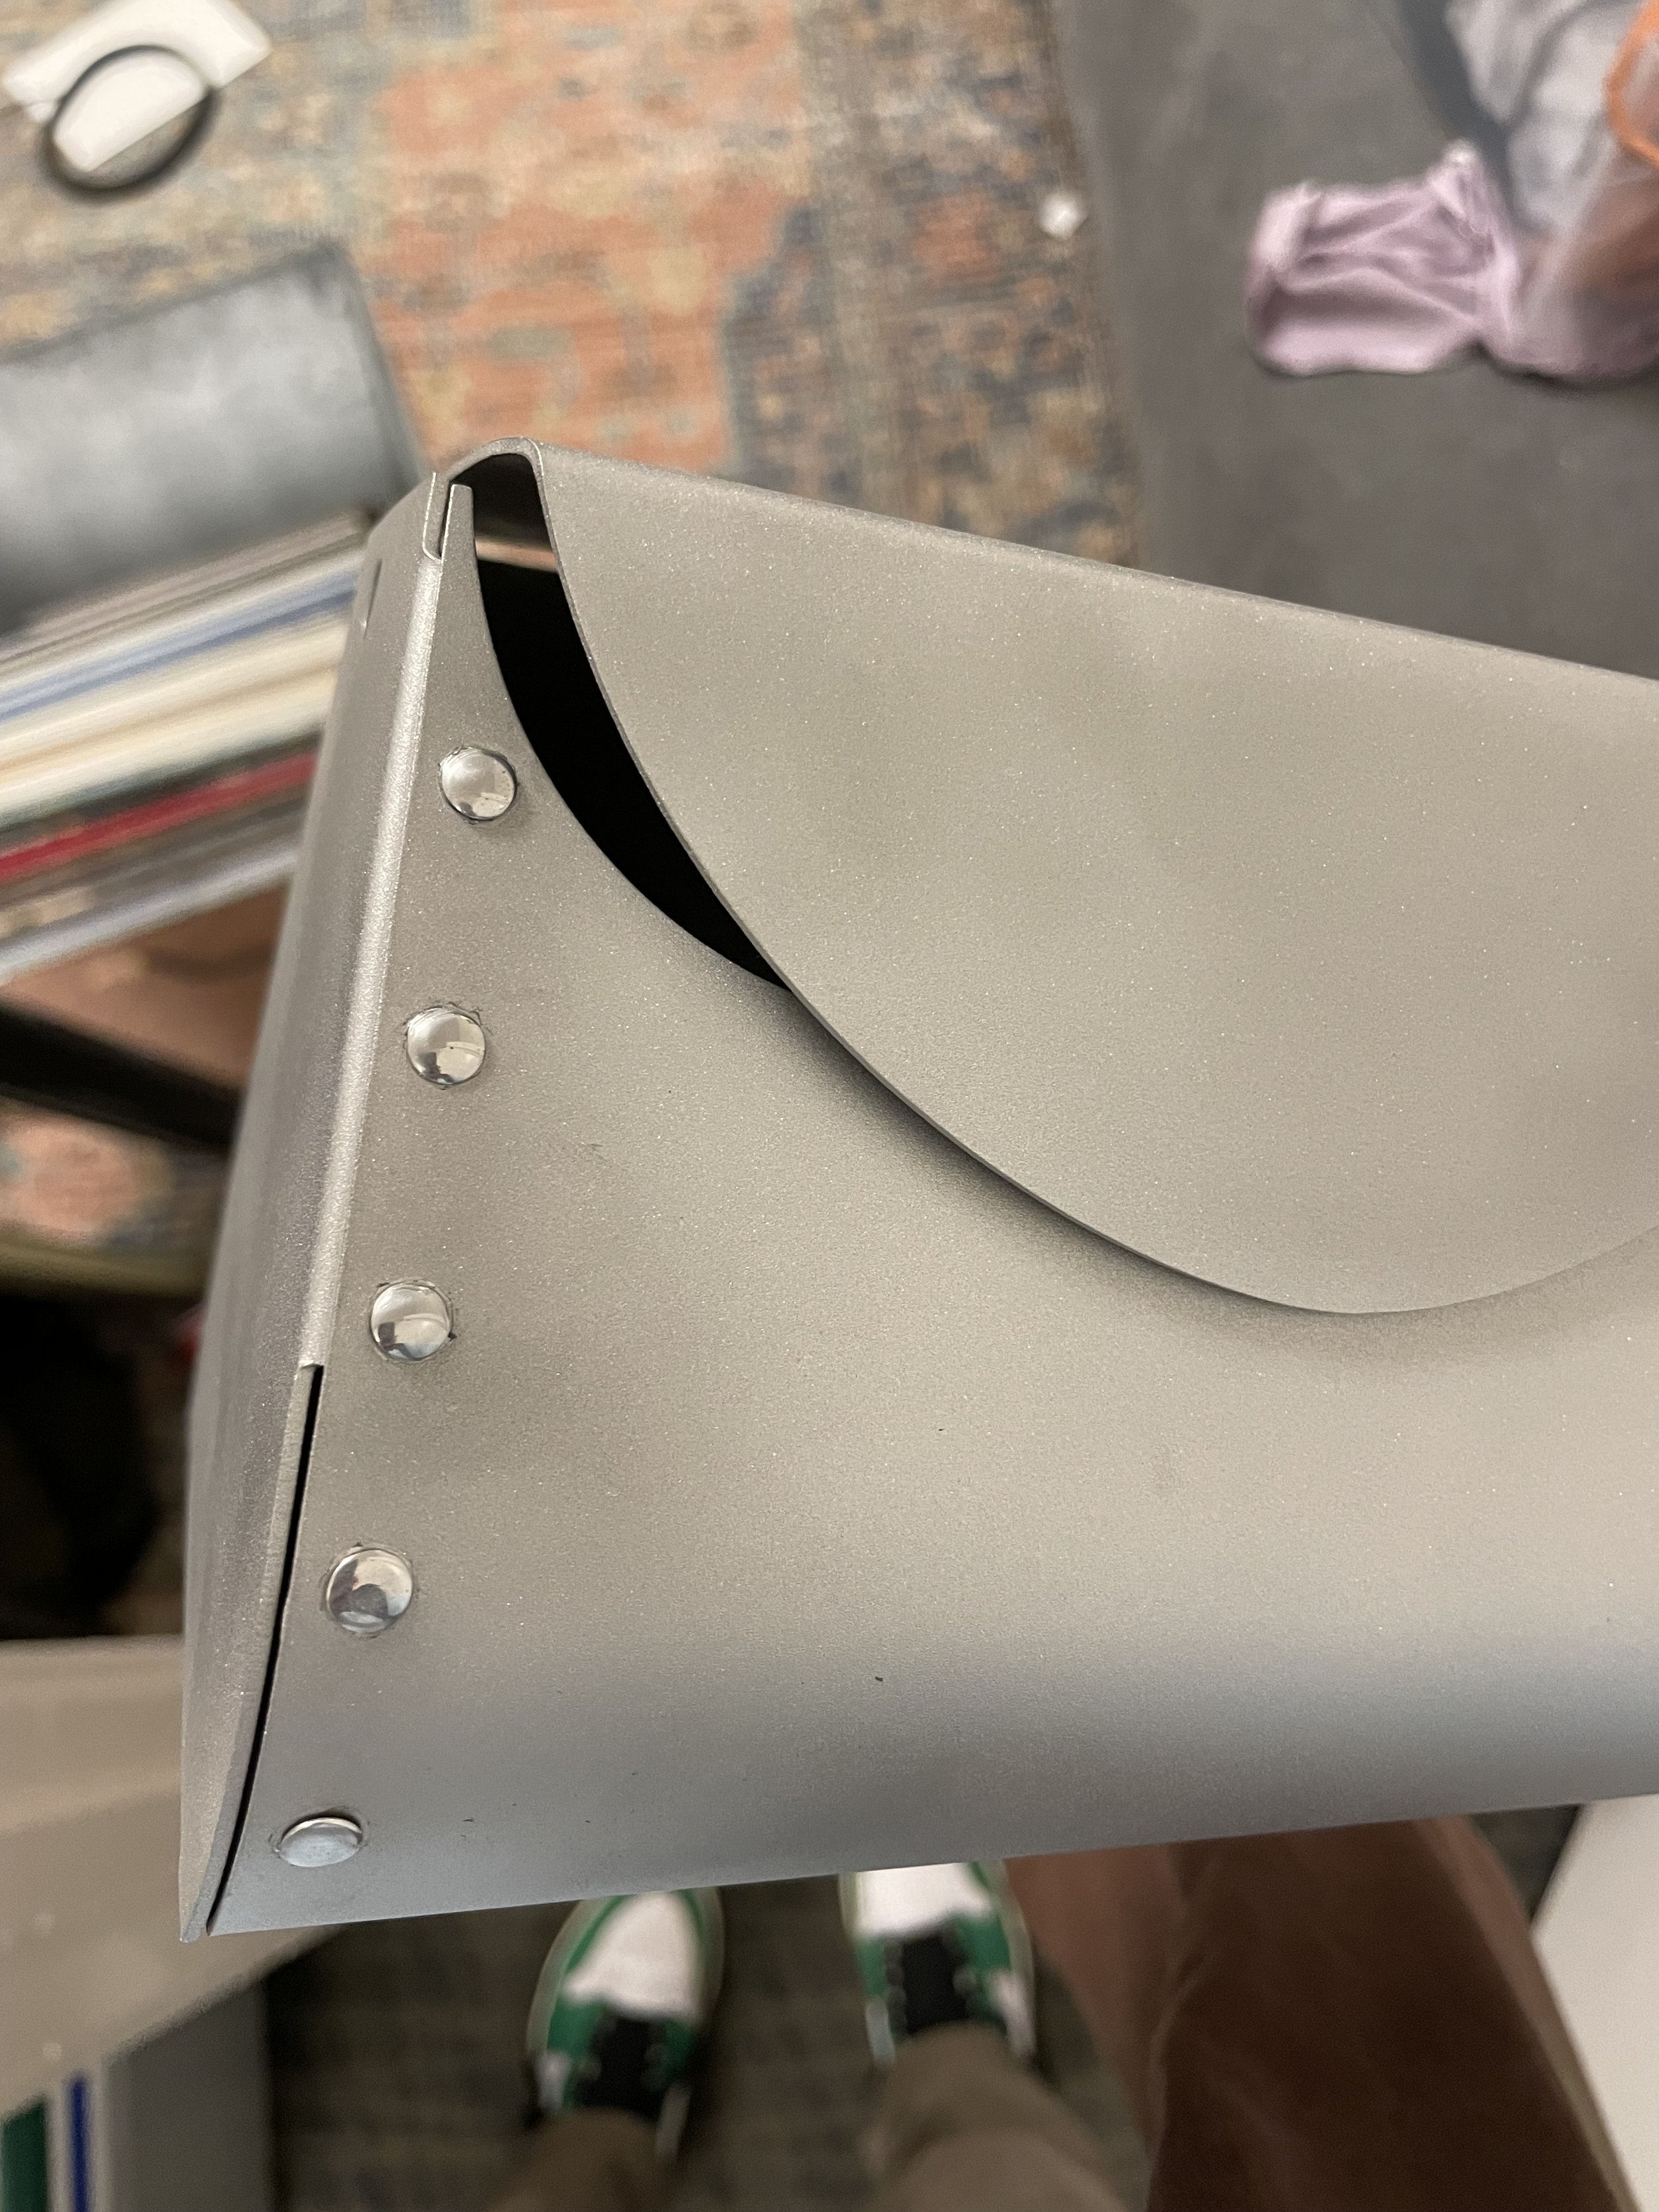
Final riveted body
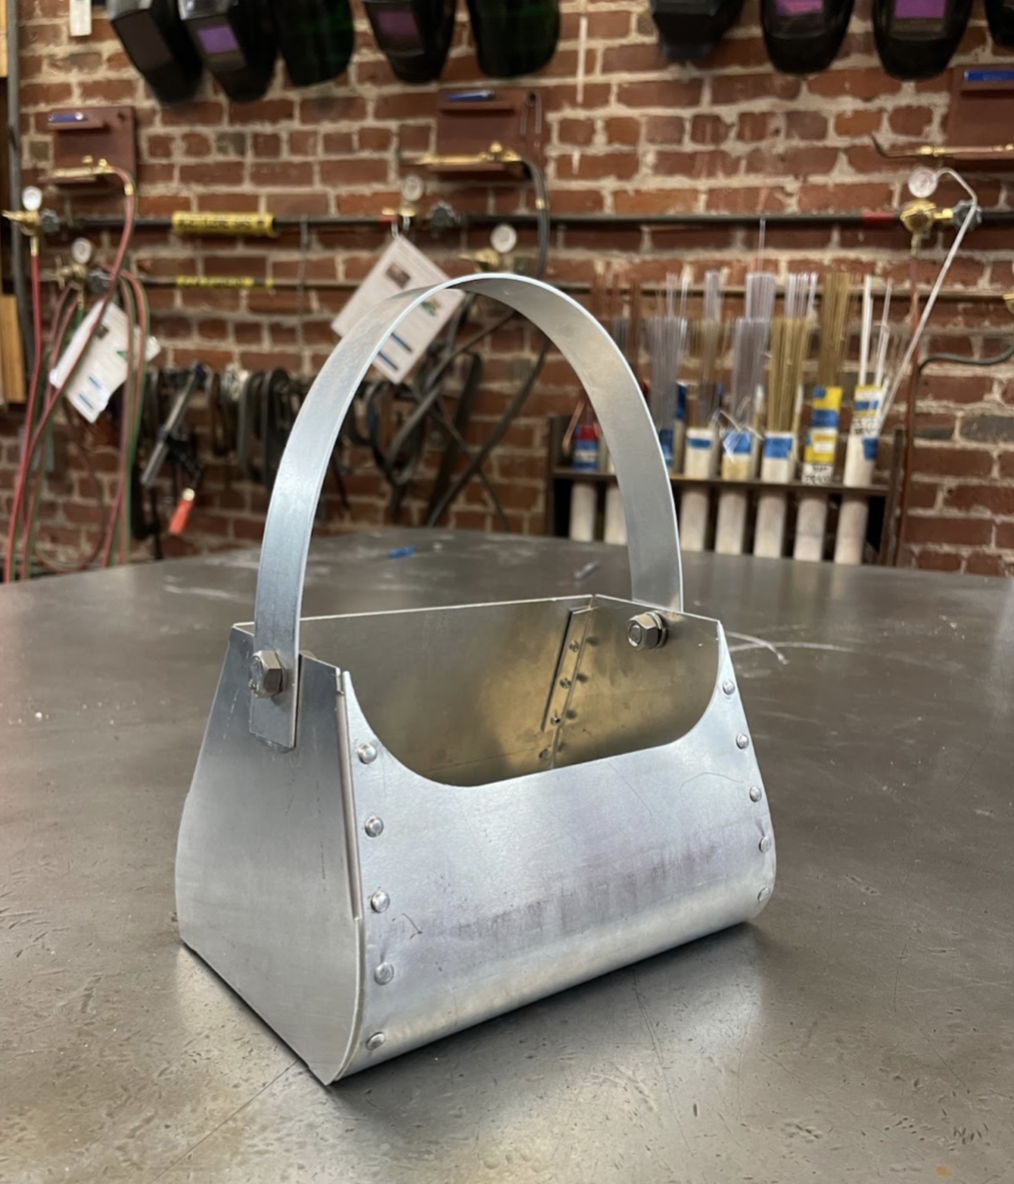
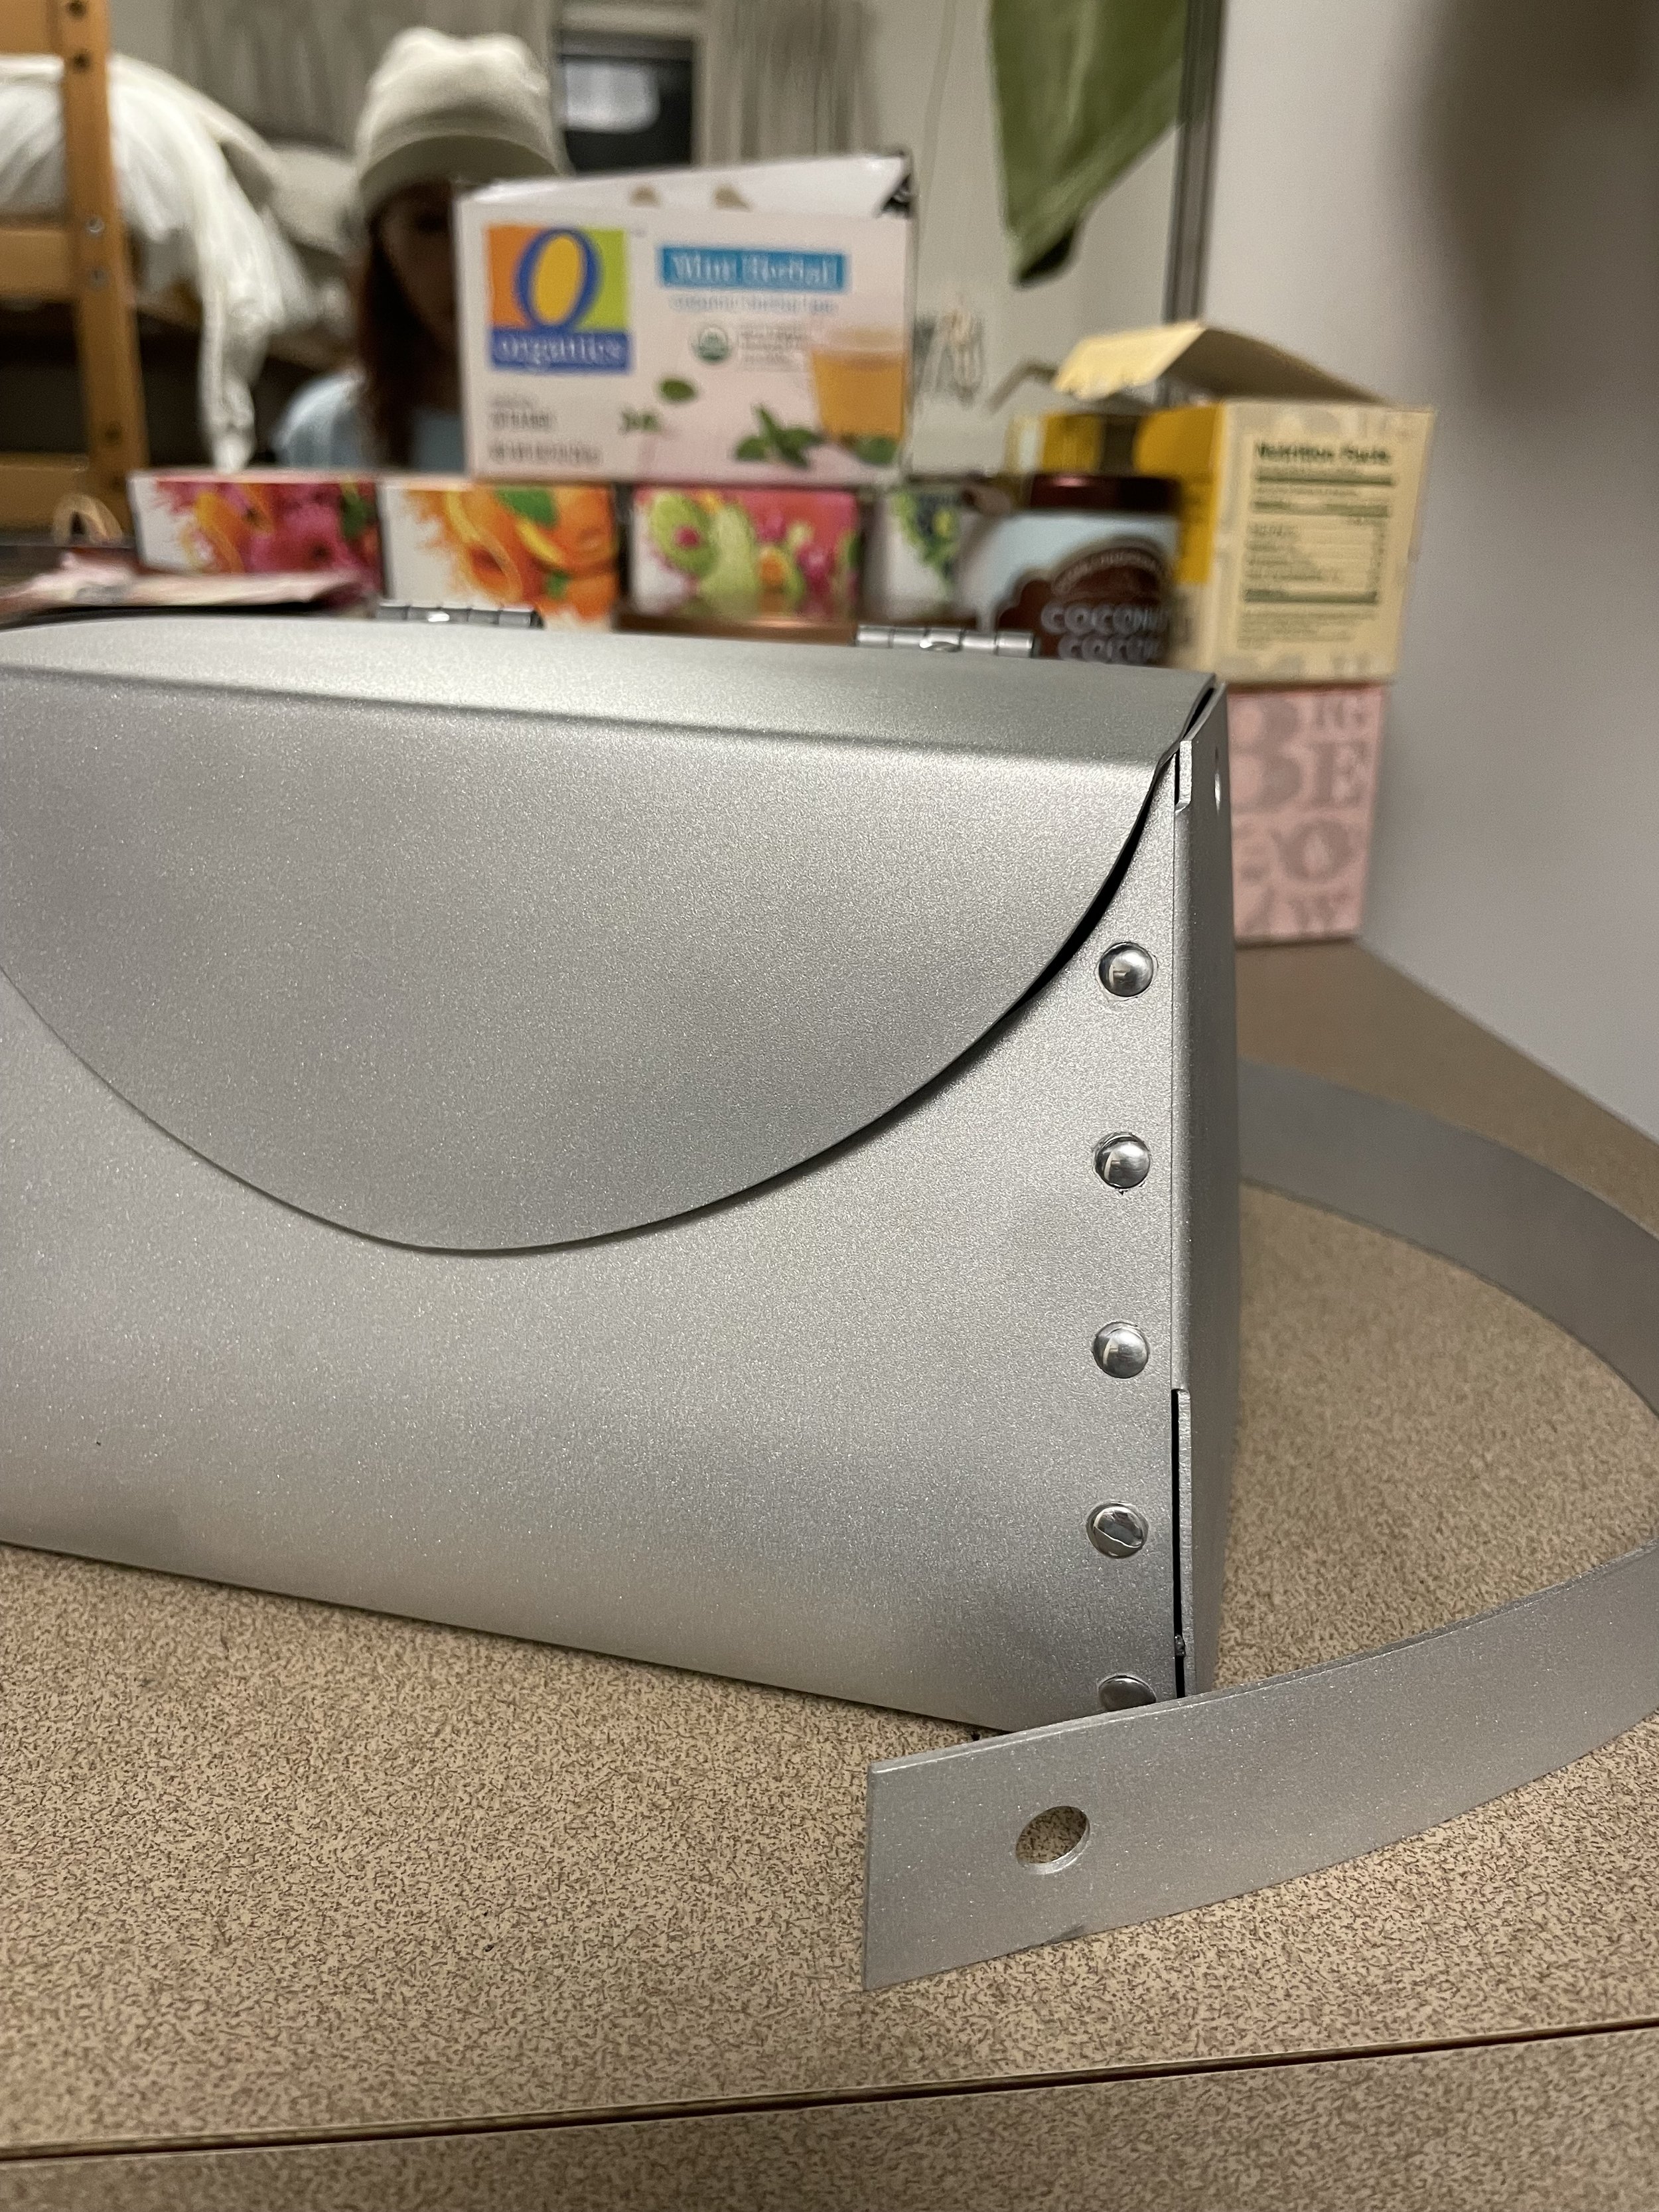
Slip rolled and adjusted the length of the purse strap until I was satisfied with its aesthetic. Used hex bolt with lock to secure the strap to the bag
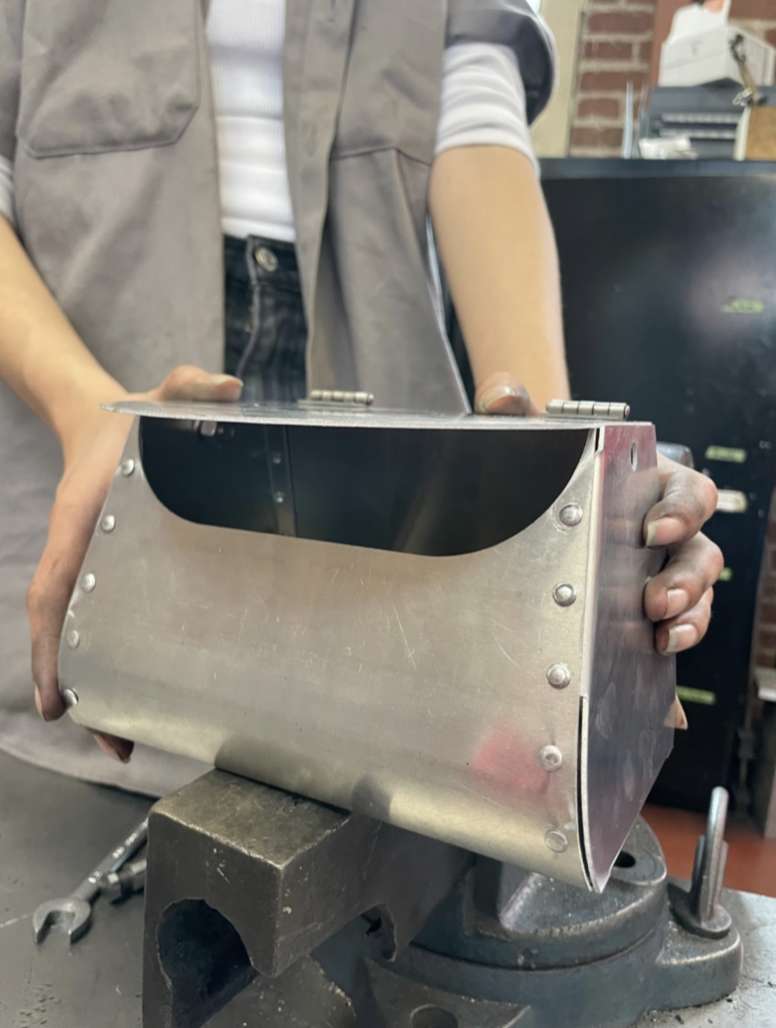
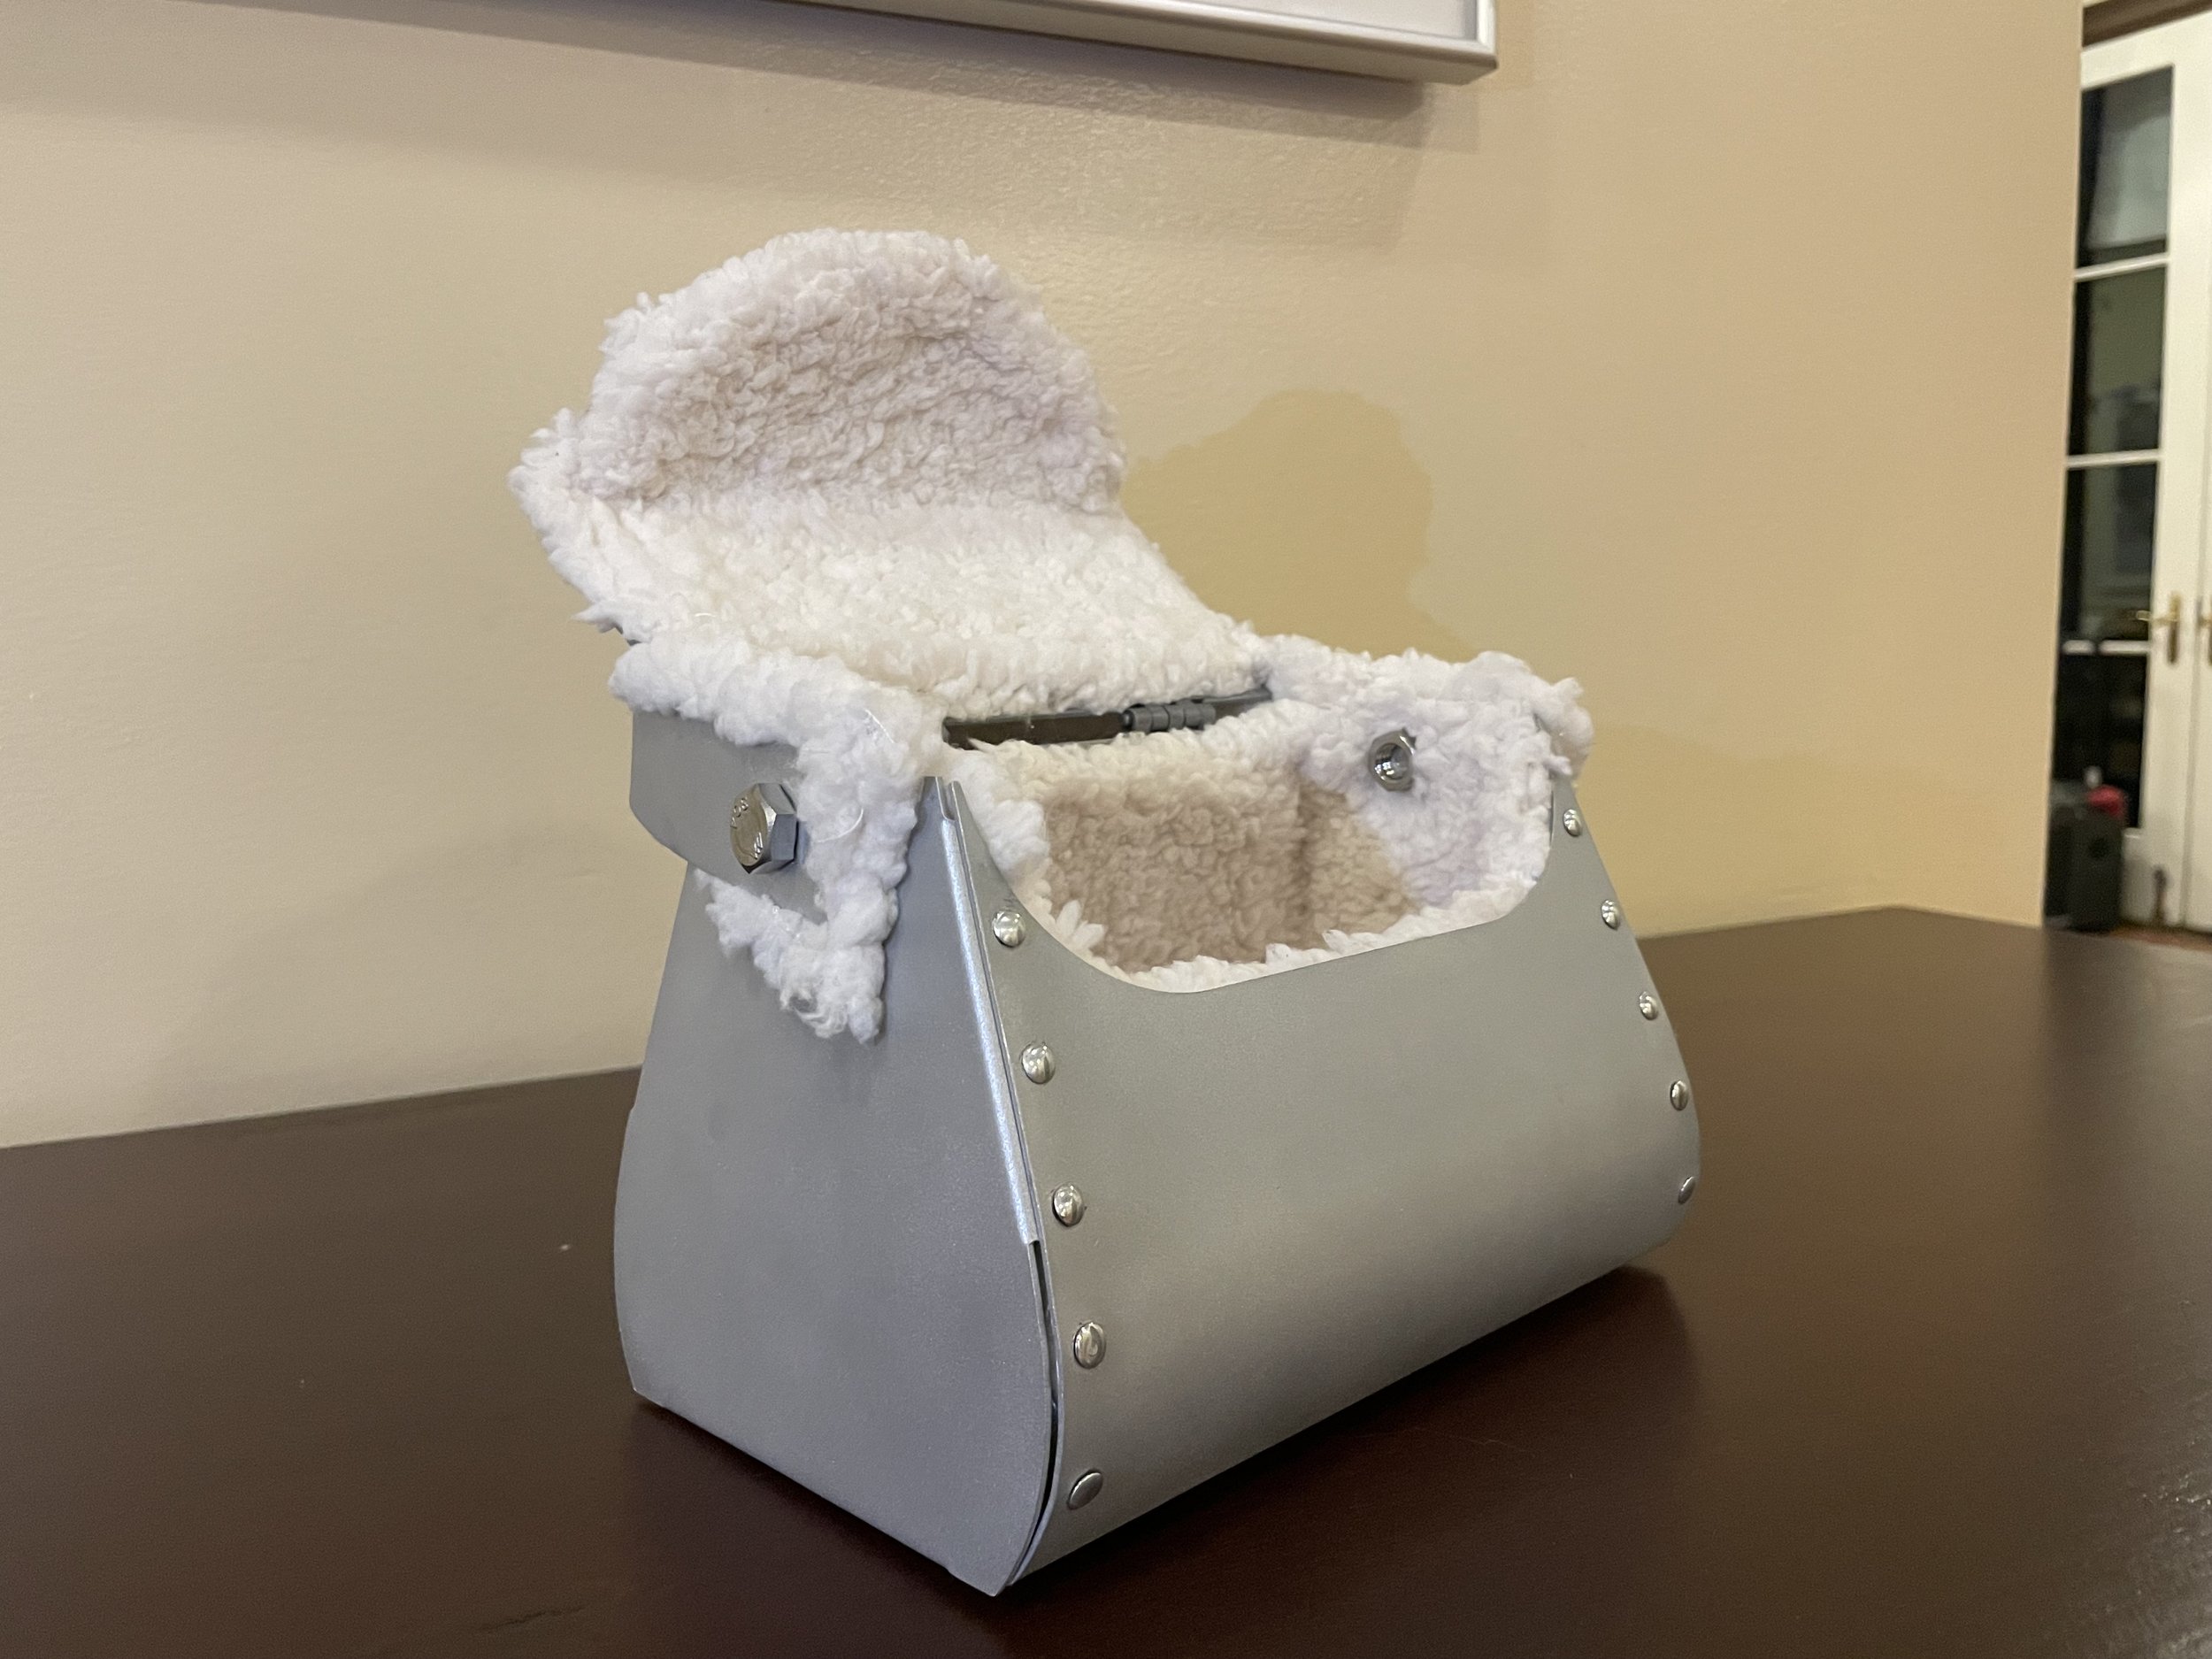
View of hinges in their originally chosen placement.
Finishing Touches
Below are process photos of the finishing and upholstering of the purse. Click on an image to learn more.
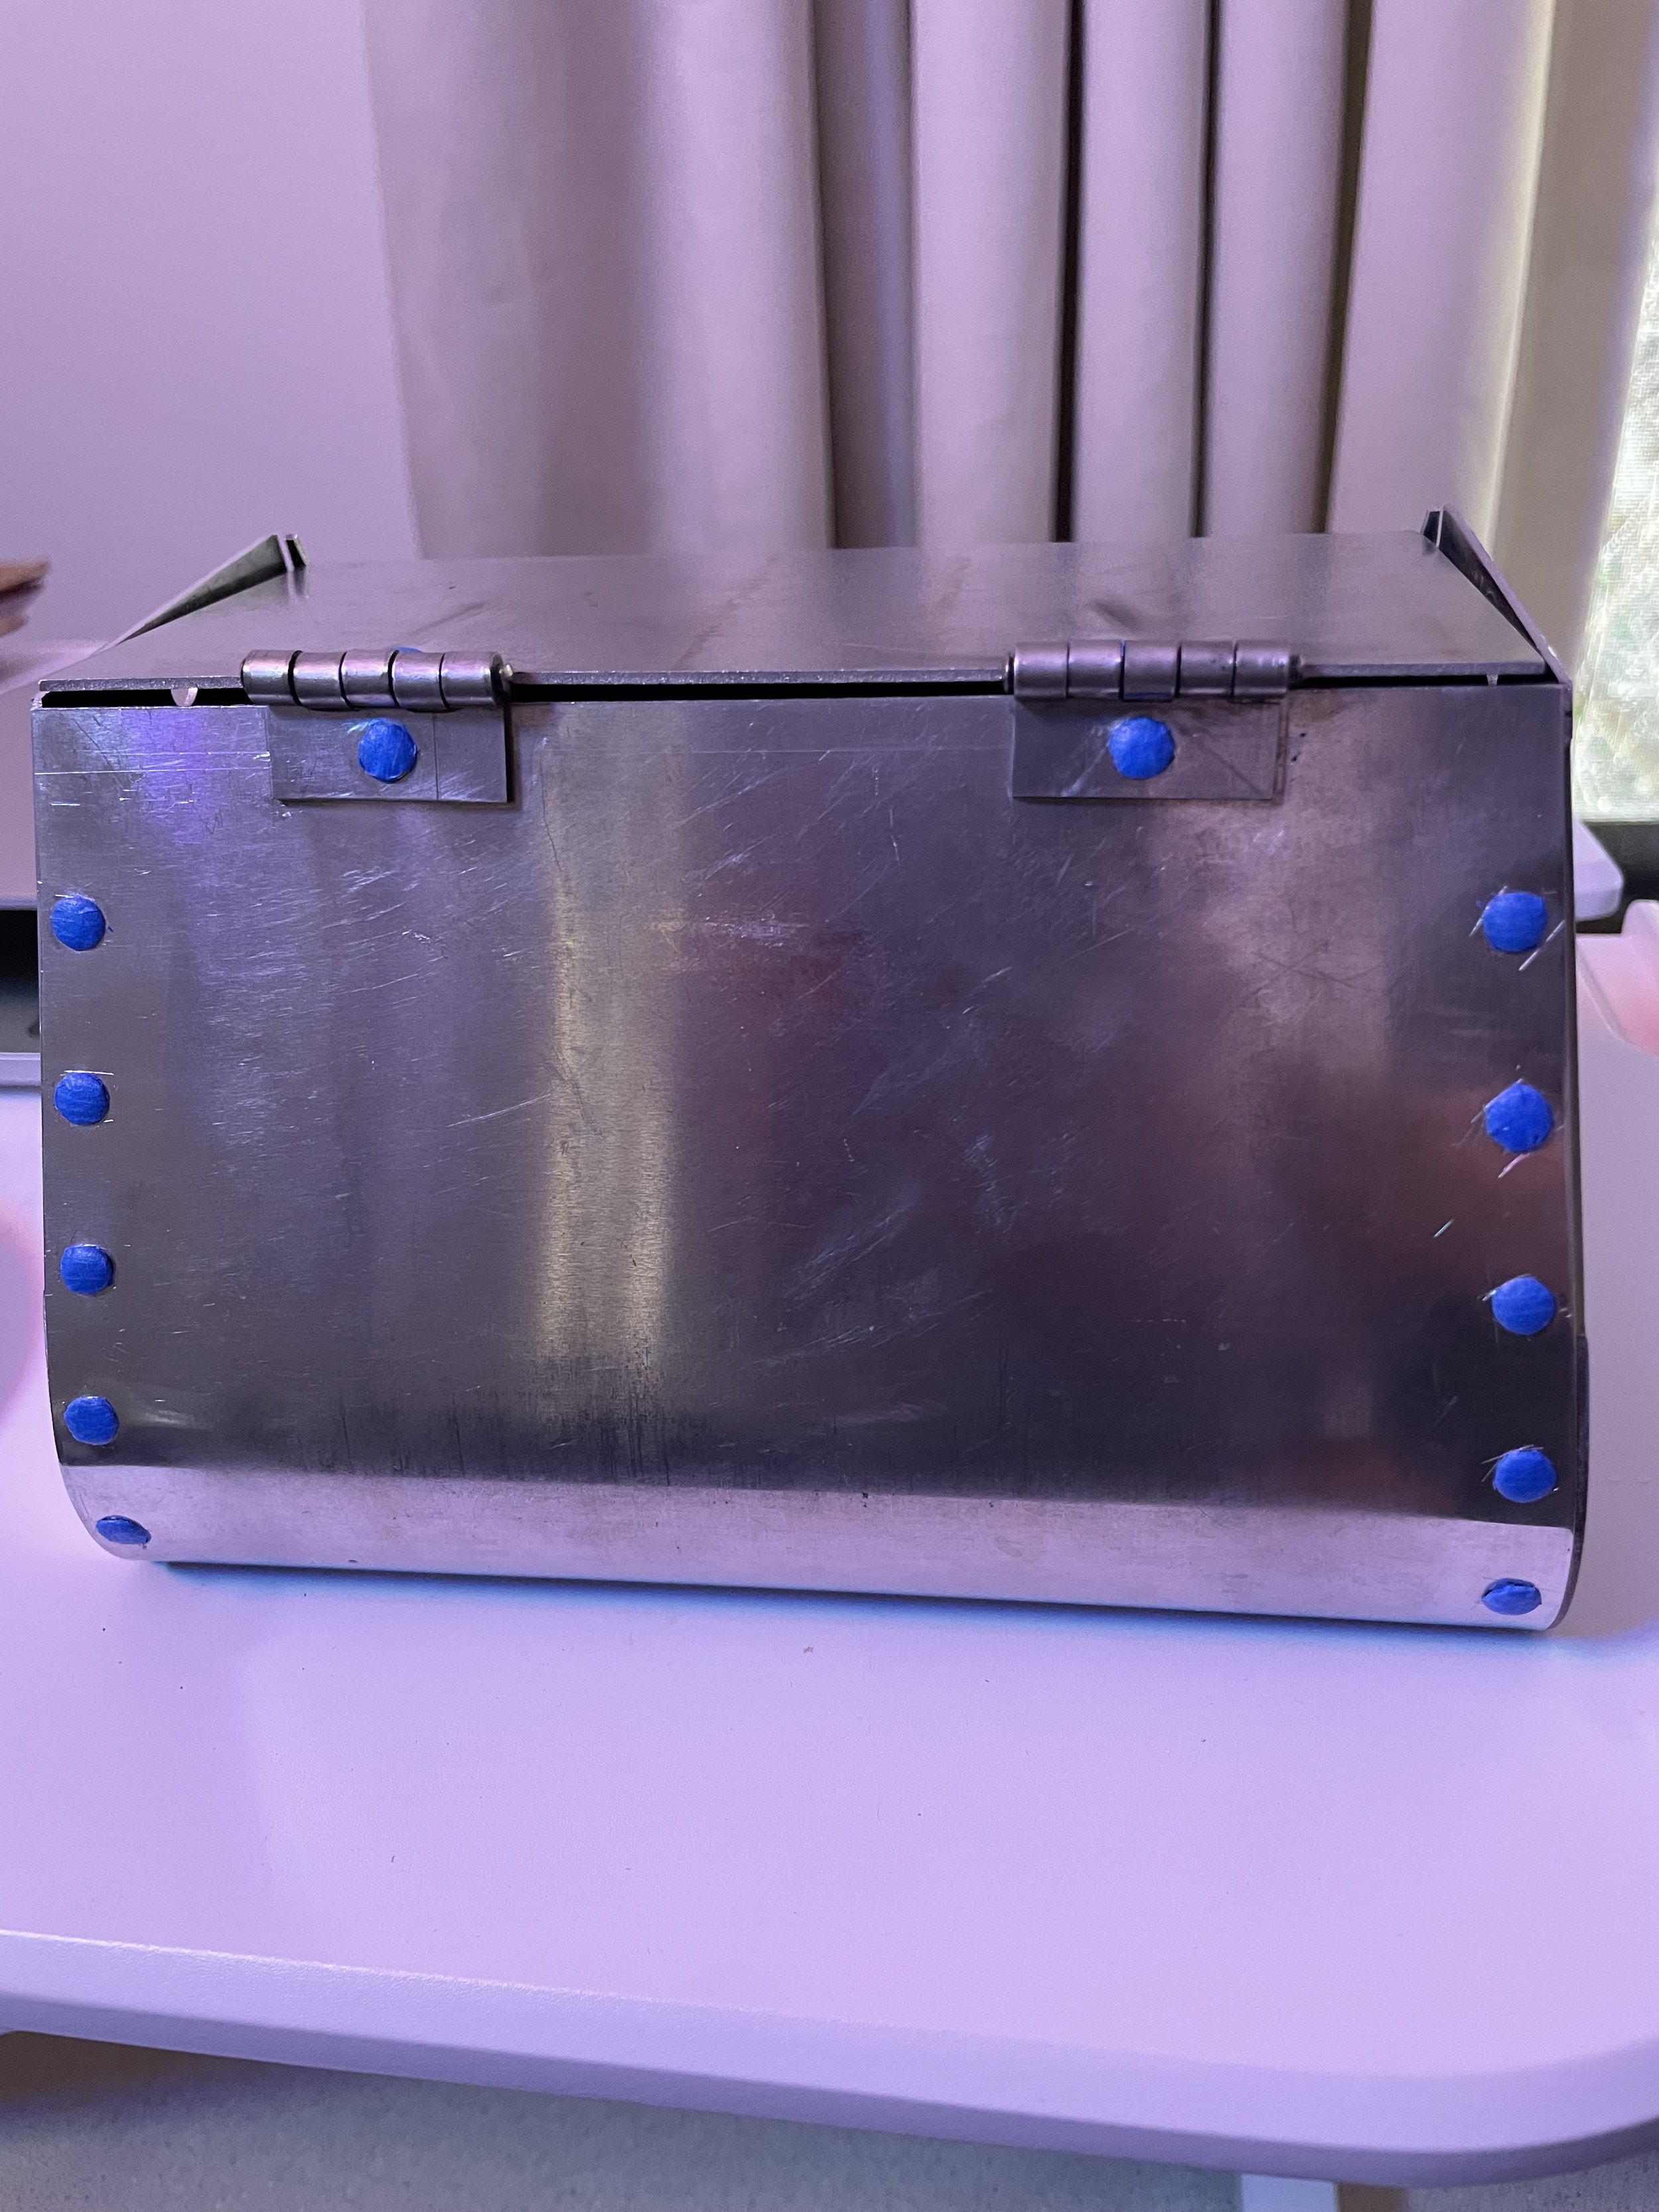
Taping off rivets before Bead Blasting body

Initial reveal of the finish
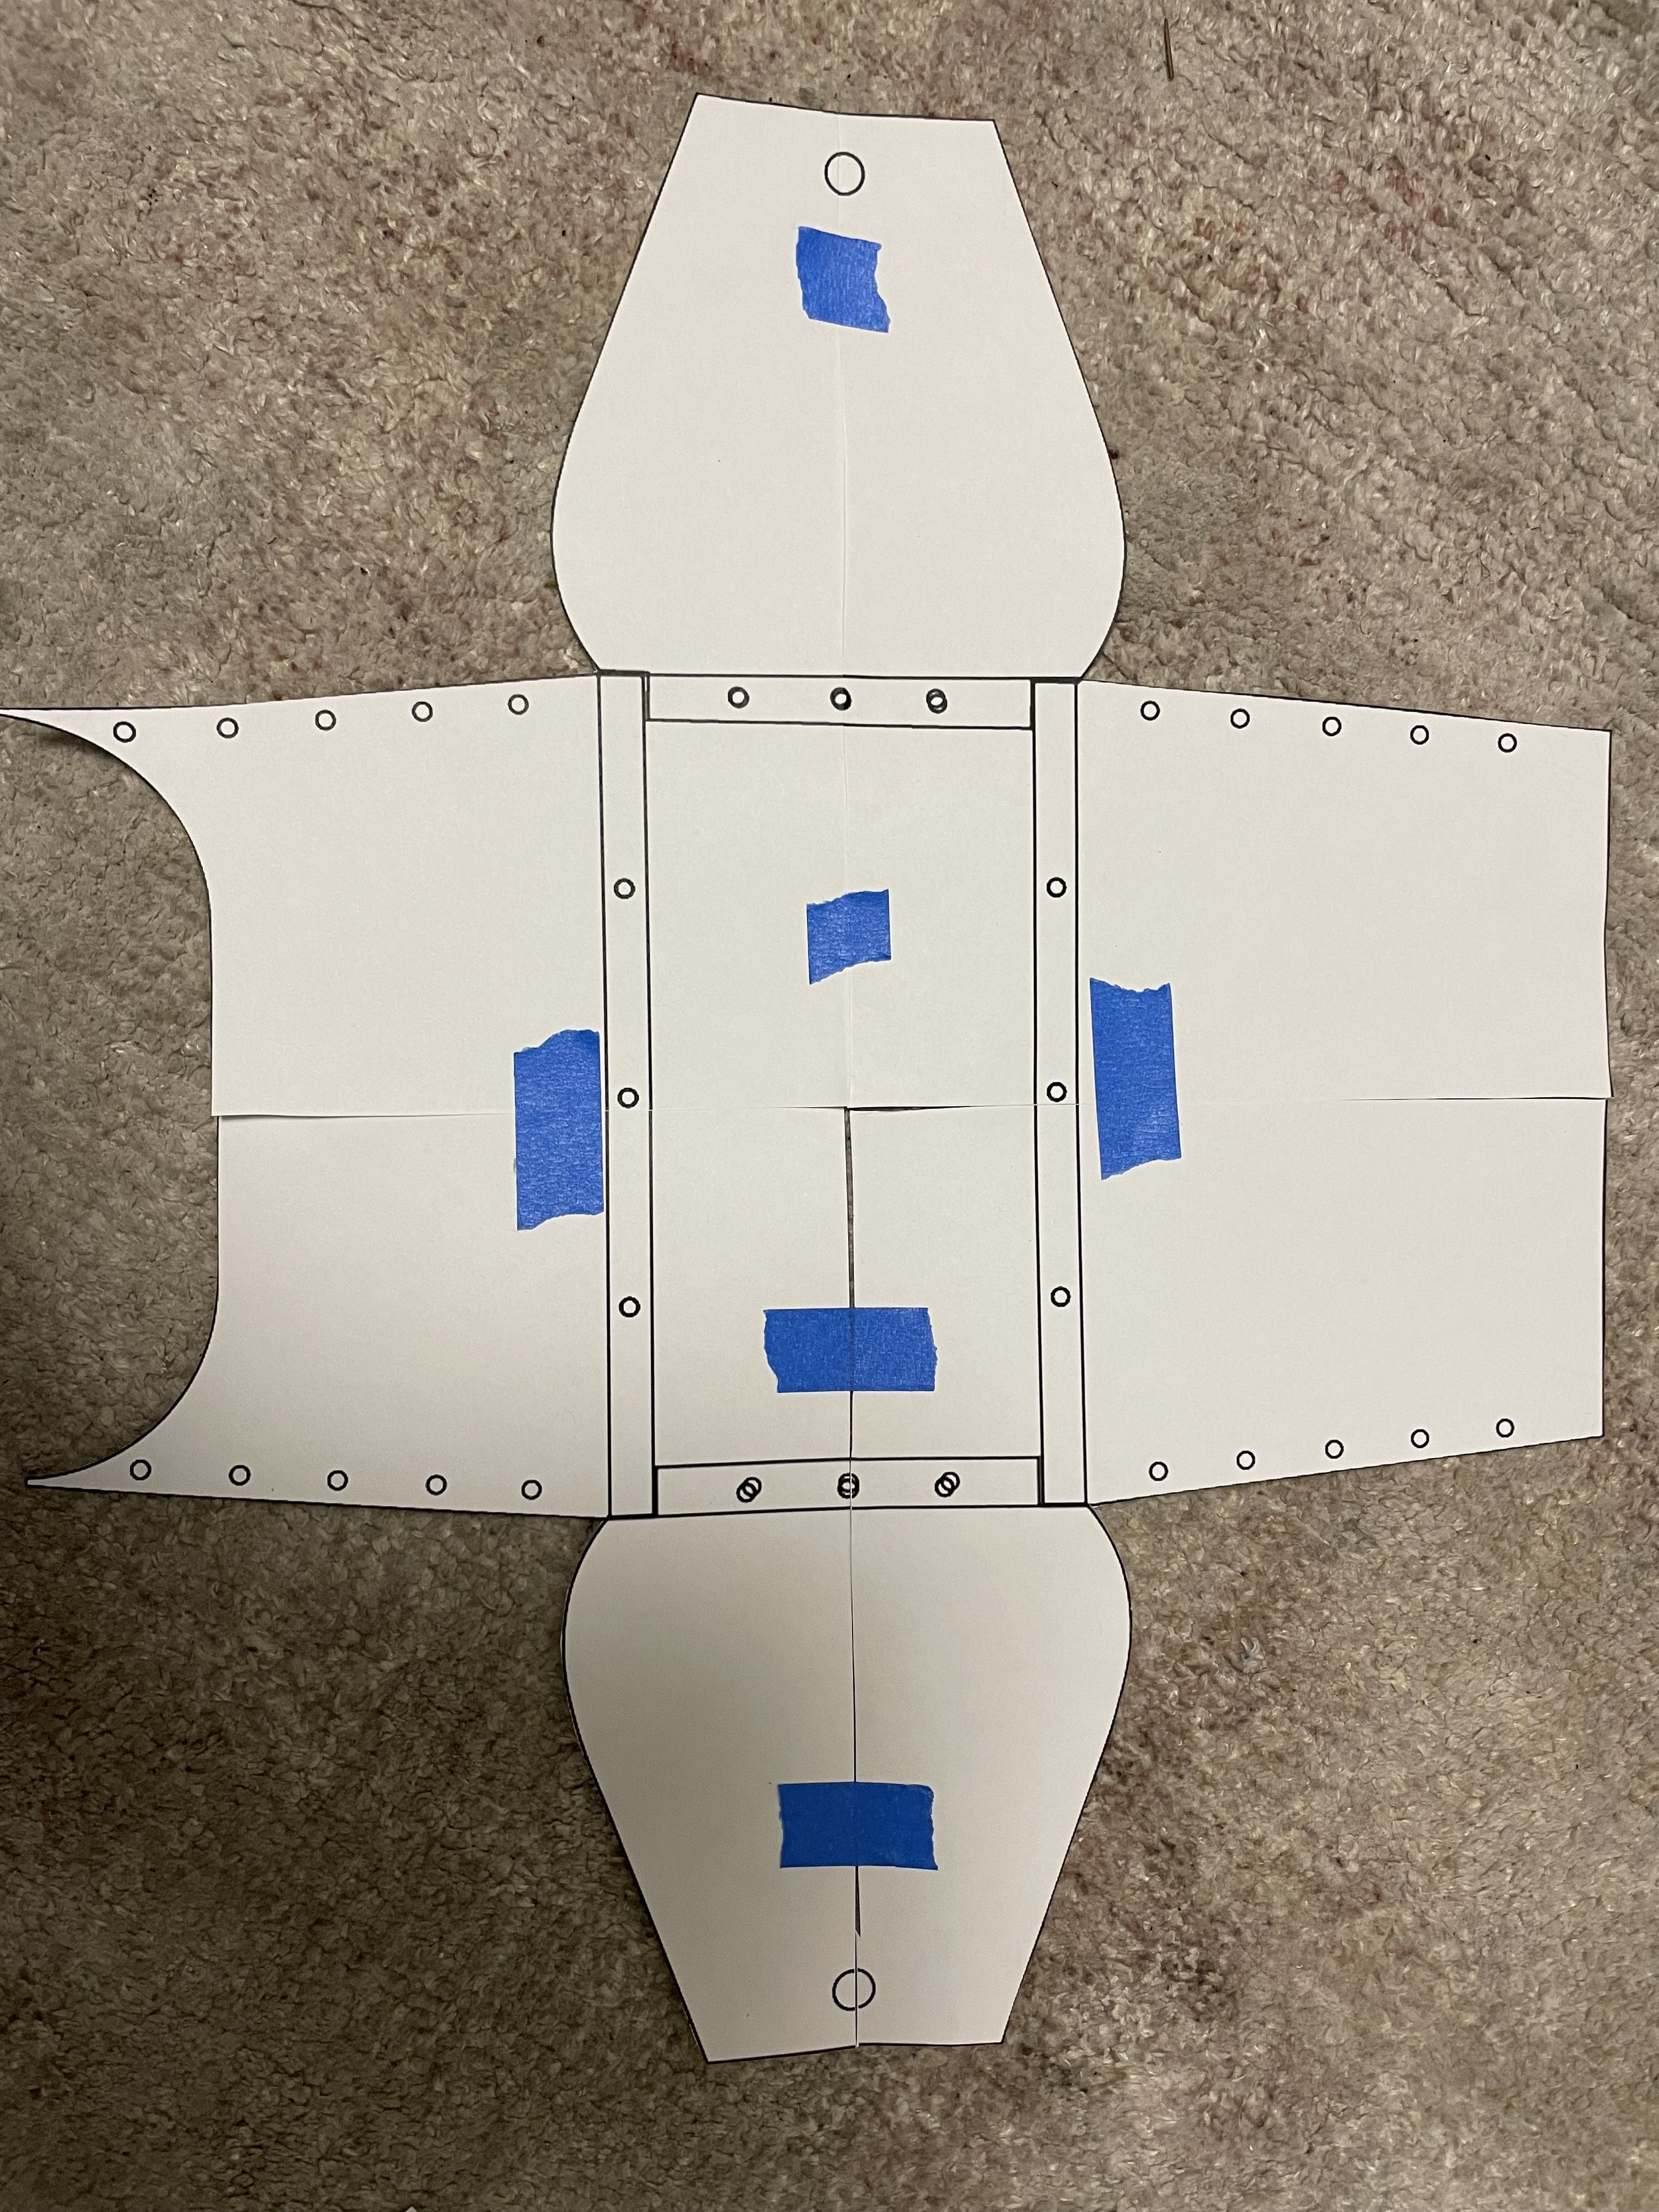
Printed out the Waterjet pattern to trace onto fabric in order to upholster the interior of the purse
Initial upholstery. Went in a second time to increase the amount of fur for a more aesthetically desirable outcome